Prototypes are the crucial bridge between concept and production in product design and development. They provide a tangible representation of your vision, allowing for design refinements, user testing, and a smoother transition to mass production. However, crafting a professional-grade prototype requires an insightful approach and a nuanced understanding of the process.
This guide will explore six expert tips for creating high-quality, professional prototypes that can elevate your design process and position your product for success in the marketplace.
Tip 1: Always Begin with a Detailed Plan
Every successful prototype begins with a comprehensive plan. This helps prevent wasted resources and ensures that your prototype effectively represents your final product. By planning, you can ensure that your prototype process is as efficient and productive as possible.
1.1. Define Your Goals
Before you begin prototyping, it’s crucial to define your objectives clearly. Are you creating a prototype for functionality testing, for investor presentations, or for gaining customer feedback? Each goal will require a different prototype type and level of detail.
For example, if you need to test your product’s functionality, you might require a working prototype with all the functional features of the final product. On the other hand, if the prototype is for investor presentations, aesthetic appeal and form might be more important than function.
1.2. Understand Your User
Your end-users are the people who will ultimately be using your product, so their needs and preferences should guide the design of your prototype. Understand your target audience, their requirements, and how they interact with the product.
You can use user persona creation and journey mapping techniques to gain insights into your user’s behaviors, needs, and expectations. This information will help you make informed design decisions that align with your user’s needs.
1.3. Map Out Your Design
Once you’ve defined your goals and understood your users, the next step is to map out your design. Begin with sketches or 3D models of your product concept. These can help visualize your idea and serve as a reference point for the physical prototype.
Consider using CAD software to create precise 3D models. This can help identify potential design flaws early in the process and provide valuable guidance when it comes time to manufacture the prototype.
- Define Your Goals
- Understand Your User
- Map Out Your Design
Tip 2: Choose the Right Materials
Material selection is an integral part of the prototyping process. The materials you choose should mimic the final product’s properties as closely as possible to give you accurate testing results and feedback.
2.1. Consider Material Properties

Different materials have different properties that can impact the performance and appearance of your prototype. When choosing materials, consider properties like strength, durability, weight, flexibility, cost, and availability.
For instance, if your final product is made of metal, you should ideally use metal in your prototype, too. However, in some cases, using a less expensive material with similar properties might be more cost-effective, like certain types of plastic.
2.2. Think about the Aesthetics
The aesthetics of your prototype can be particularly important if you’re using it for presentations or to garner customer feedback. The appearance of the material, its color, texture, and how it feels to touch can all influence perceptions of your product. Therefore, choosing materials that will provide the right look and feel is essential.
Here’s a quick checklist for selecting the suitable materials for your prototype:
- Material’s physical properties: strength, durability, weight, flexibility
- Aesthetic properties: color, texture, feel
- Cost and availability
- Compatibility with your prototyping process (e.g., CNC machining, 3D printing, laser cutting)
Tip 3: Utilize Rapid Prototyping Techniques
Rapid prototyping involves quickly fabricating a physical part or model using 3D computer-aided design (CAD) data. These techniques have become increasingly popular due to their speed, affordability, and effectiveness.
3.1 3D Printing
3D printing is a popular method of rapid prototyping. It allows for the creation of complex geometric forms that might not be possible using traditional manufacturing methods. 3D printing is ideal for visualizing a product’s aesthetic appeal and ergonomics.
3.2 CNC Machining
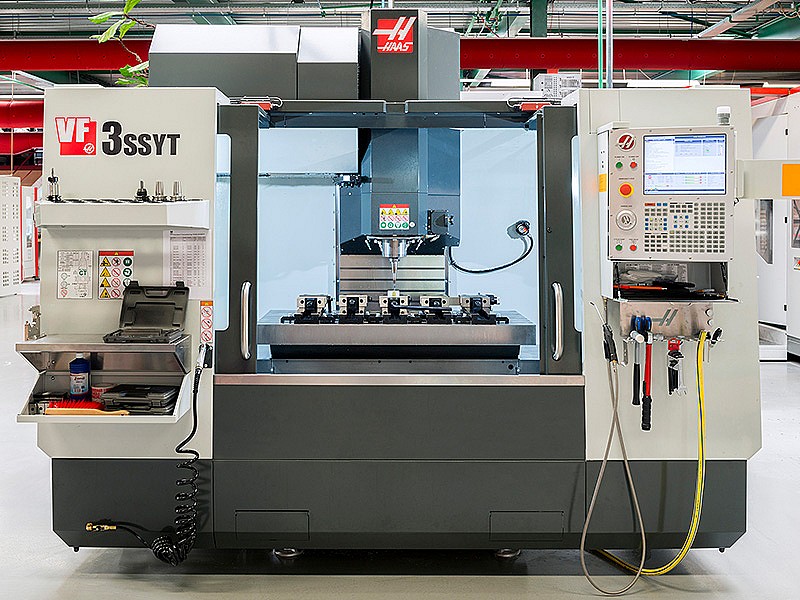
CNC machining provides high precision and excellent material compatibility, making it a versatile rapid prototyping technique. It can be used to create functional prototypes from the same material as the final product, offering a realistic representation of the final product’s function and appearance.
3.3 Selective Laser Sintering (SLS)
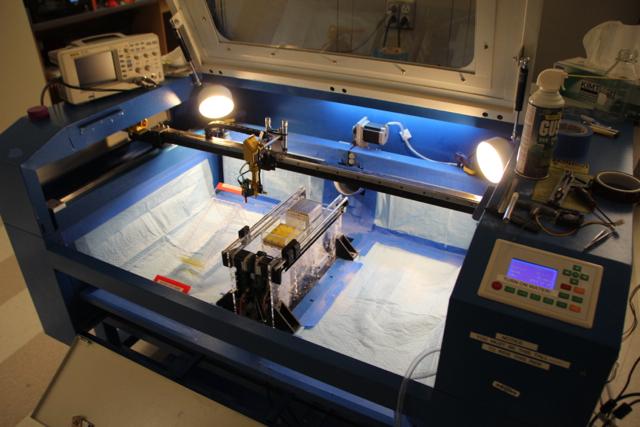
SLS is another rapid prototyping technique that uses a high-powered laser to fuse small particles of plastic, metal, ceramic, or glass powders into a desired 3D shape. It’s best for creating detailed, durable prototypes.
Key points for this section are:
- 3D Printing: Ideal for complex shapes and visual prototypes.
- CNC Machining: Perfect for high-precision and functional prototypes.
- Selective Laser Sintering: Suitable for detailed and durable prototypes.
Try Prolean Now!
Tip 4: Test and Iterate Your Design
Creating a prototype is not a one-off process. Instead, it involves multiple iterations of designing, prototyping, and testing to arrive at a product that meets your objectives.
4.1 Conduct User Testing
Conduct user testing to ensure that your product meets user needs. This involves having a group of individuals representing your target users interact with your prototype and provide Feedback. By observing how users interact with your prototype, you can gain valuable insights into how to improve your product. These insights can help you identify user pain points and areas where your product can be improved.
4.2 Analyze and Apply Feedback
After you have gathered Feedback from your user testing, it is essential to analyze it. Take the time to go through each piece of Feedback and understand how it can be applied to improve your prototype. Prioritize Feedback based on your product goals and user needs, and apply changes in the next iteration of your prototype. By taking the time to analyze and apply Feedback, you can ensure that each iteration of your prototype is better than the last.
4.3 Iterate Your Design
The prototyping process involves a continuous design, testing, and iteration cycle. Each iteration of your design brings you closer to a product that fulfills user needs and meets your business objectives. As you iterate your design, it is essential to take the time to reflect on what you have learned from each iteration. Use this knowledge to make informed decisions about improving your product further. By embracing a culture of continuous iteration, you can ensure that your product is constantly evolving to meet the needs of your users.
Tip 5: Ensure Prototype Scalability
In manufacturing and product development, scalability refers to the capability to adapt to increased production demands. A well-designed prototype should be able to seamlessly scale from a single prototype to mass production.
5.1 Design with Manufacturing in Mind
Consider the manufacturing process during the design phase. This will help to avoid potential manufacturing roadblocks and additional costs later on. For instance, mass production may be impossible if a prototype part design includes too many undercuts or complex shapes.
5.2 Consult with Manufacturing Experts
Manufacturing experts can provide critical insights about scalability issues early on. They have the experience and knowledge to identify potential problems when transitioning from prototype to production.
5.3 Use Scalable Prototyping Techniques
Some prototyping techniques are more scalable than others. For example, CNC machining and injection molding can easily transition from prototype to mass production.
Critical tips for ensuring prototype scalability:
- Design with manufacturing in mind.
- Consult with manufacturing experts.
- Use scalable prototyping techniques.
Tip 6: Seek Professional Prototyping Services
Lastly, working with a professional prototyping service can significantly enhance the outcome of your prototype. These services bring a wealth of experience, sophisticated tools, and a deep understanding of materials and manufacturing processes.
6.1 Access to Advanced Tools and Techniques
Professional prototyping services, like Prolean’s CNC Rapid Prototyping Services, can access the latest tools and technologies, such as high-precision CNC machines, 3D printers, and advanced CAD software, ensuring your prototype is made to the highest standard.
6.2 Knowledge of Materials and Manufacturing Processes
Prototyping services have deep knowledge of various materials and their properties and a thorough understanding of different manufacturing processes. This expertise ensures your prototype will be made with the appropriate materials and processes for your specific needs.
6.3 Professional Advice and Support
Working with a professional prototyping service provides manufacturing capabilities and invaluable advice and support. These professionals can guide you in improving your design for better manufacturability, cost-effectiveness, and functionality.
Prototype Testing and Iteration
After creating your prototype, it’s not the end of the line. Proper testing and subsequent iteration based on the test results are essential for making a successful, market-ready product.
Conduct Rigorous Testing
Testing your prototype provides valuable insights into how it performs under real-world conditions. These tests can be conducted in-house or by a third party, and they include stress tests, usability tests, safety tests, and more. The gathered data will help you identify design flaws and areas for improvement.
Iterate Based on Feedback
Prototyping is often an iterative process. Use the data collected from your tests to refine your design and create an improved prototype version. Remember, returning to the drawing board is okay if your prototype isn’t working as expected.
Document Everything
It’s crucial to document everything during the prototyping process. Keep detailed records of your design changes, test results, and the rationale behind your decisions. This will not only help you track your project’s progress but will also be invaluable if you need to revisit earlier stages.
Conclusion
Building a professional prototype is critical in transforming your innovative idea into a tangible and functional product. This process requires more than just creating a visual representation of your idea. It demands thorough planning, understanding of the suitable materials, impeccable design, knowledge of manufacturing constraints, rigorous testing, and iteration to perfect your product.
Each of the six tips mentioned in this article is a critical puzzle. Beginning with a detailed plan allows you to plot out the course of your project and helps prevent unnecessary mistakes and delays. Choosing the suitable materials is crucial for ensuring your prototype performs as intended in its operating environment. Designing for manufacturing from the start can save you significant time and resources while making it easier to transition from prototype to mass production.
FAQs
What is the importance of prototype testing and iteration?
Prototype testing provides valuable insights into the prototype’s real-world performance, revealing any design flaws and areas for improvement. Based on this feedback, the iteration process refines the design, leading to an improved prototype.
What is the role of documentation in the prototyping process?
Documentation is crucial in the prototyping process. It records detailed design changes, test results, and the rationale behind decisions. This helps track project progress and is invaluable if earlier stages of the project need to be revisited.
How can I ensure the scalability of my prototype?
Design with manufacturing in mind, consult with manufacturing experts, and use scalable prototyping techniques to ensure the scalability of your prototype. A scalable prototype can adapt to increased production demands, transitioning smoothly from a single prototype to mass production.
Why should I use Prolean’s CNC Rapid Prototyping Services?
Prolean’s CNC Rapid Prototyping Services offers state-of-the-art facilities and equipment, expert guidance, a streamlined process, and high-quality, functional prototypes.

Mein Freund und ich arbeiten gerade an einem Elektromotorenprototyp. Die Wahl der richtigen Materialien ist gar nicht so leicht. Jedes hat so seine eigenen Vorteile.