CAPABILITIES
Prolean’s Machining Standard
Consistent Quality, Full Process Control


All uploads are secure and confidential.
Certifications: ISO 9001:2015
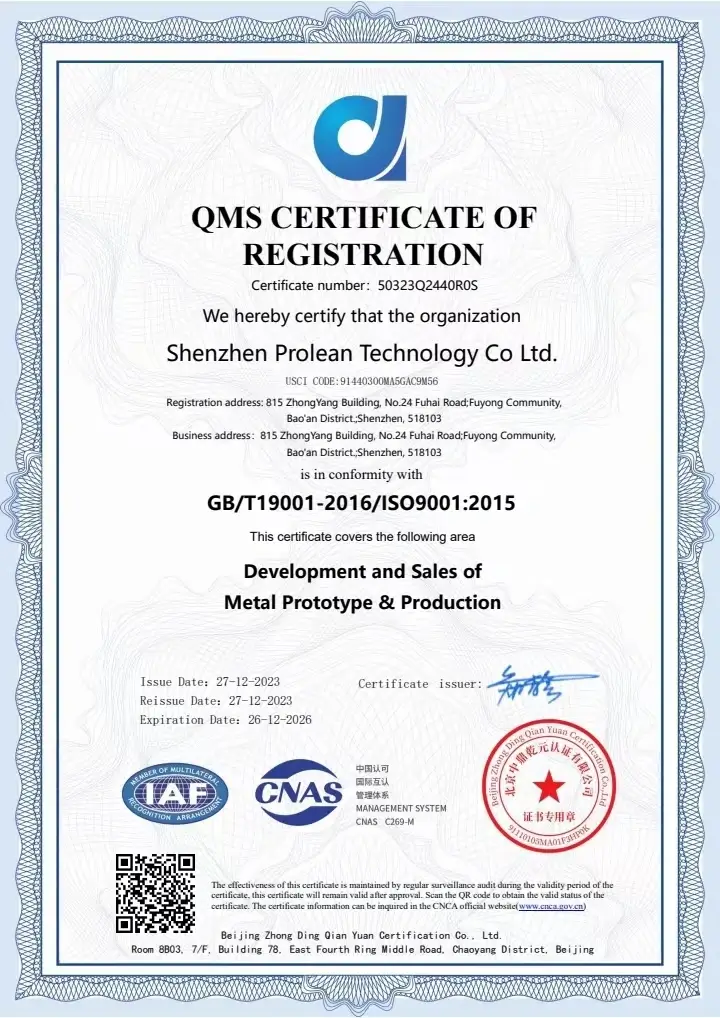
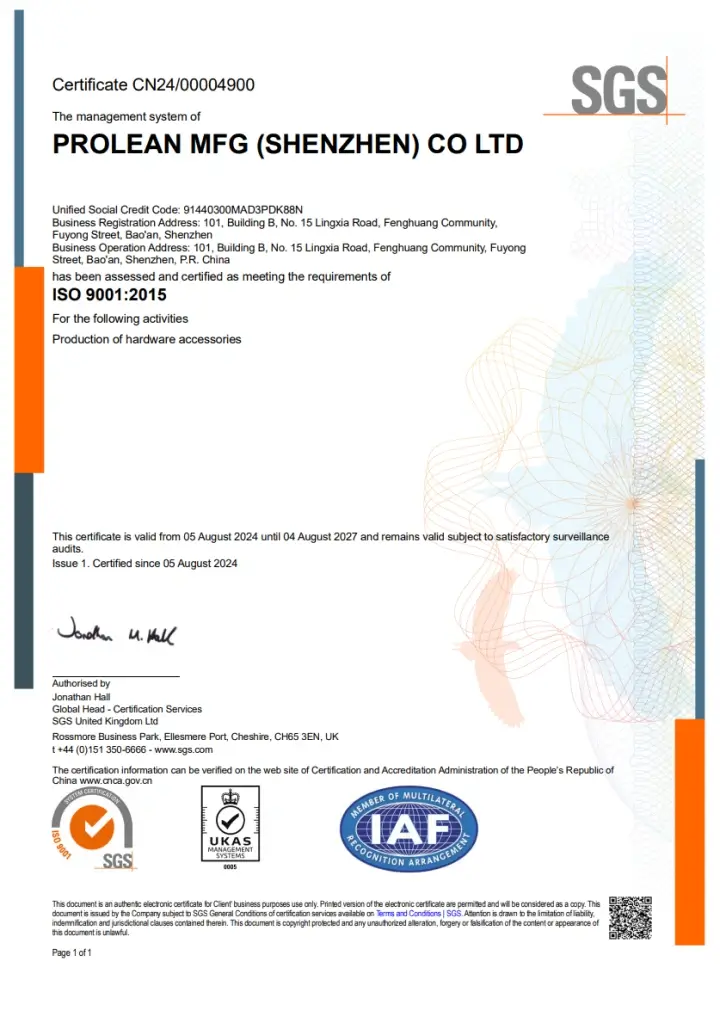
We strictly adhere to the requirements set forth by the ISO 9001:2015 standard in our production and management processes. Please see the attached Quality Management System (QMS) documentation and the SGS-certified certificate below. You can also verify through the link provided below.
QMS Certifications:GB/T19001-2016/ISO 9001:2015
SGS Certifications:ISO 9001:2015
Machining Standards
GENERAL TOLERANCE
For manufacturing, we provide two types of tolerance standards: “General tolerance” and “Tight tolerance.” We use the general tolerance if no tolerances are specified on the drawing. If you want tighter tolerance for your parts, ensure that you have specified the position and features where you need tighter tolerance in the technical drawing.
| Metallic parts | ISO-2768 fH, fine |
| Plastic parts | ISO-2768 mK, medium |
Thread tolerances
We provide four different standards for thread: UNC, UNF, Metric, & NPT.
UNC: UNC is the standard thread defined by the Unified Thread Standard (UTS). It is suitable when your project needs liberal tolerance for the assembly. UNC threads are commonly used in general applications.
UNF: It is also a Unified Thread Standard (UTS) defined standard. – This standard is known as the designation for Unified Fine Thread standard.
Metric: Metric standards for threads are defined according to ISO 261 and 262 & tolerances are based on ISO 965
NPT: NPT refers to National Pipe standards, and threads under these standards follow ANSI/ASME B1.20.1
We do not accept ACME or Thor-labs thread standards, but we still consider NPS, NPTS, STI, and BSP according to our client’s requirements. Therefore, we suggest specifying the standard thread specification while submitting the drawing for a quote request.
Metric Tolerances
If the tolerance of threads is not mentioned on the drawing you sent us, we maintain tolerance according to ISO 965-1 for your parts. This standard thread tolerance is for both internal and external threads (6H for internal threads & 6g for external).
| Thread | Internal | External |
| Threads up to M1, 4 | 5H | 6h |
| Threads M1, 6, and larger | 6H | 6g |
Under ISO 965-1, there are three thread tolerance class designations: high, medium, and low if you’re drawing or requirement doesn’t provide such information. As a default, we’ll utilize medium class.
UNC & UNT
Without a tolerance specification, we adhere to the thread tolerance ASME B1.1-2003 standard for UNC & UNT threads, 2A for external threads, and 2B for internal threads.
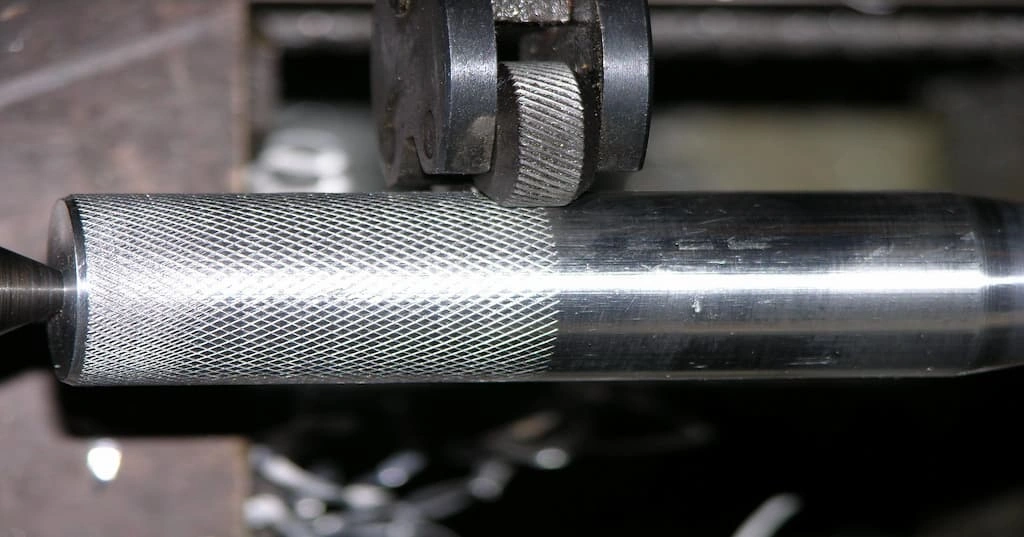
Knurling
Specify the knurling position clearly on the technical drawing if your parts need knurling.
If there is no specified knurling standard on the drawing, we follow DIN82, ISO13444:2012 by default. However, if other standards are required for the parts, we will consult first and try to fulfil your requirements.
Visual Inspection and Protection
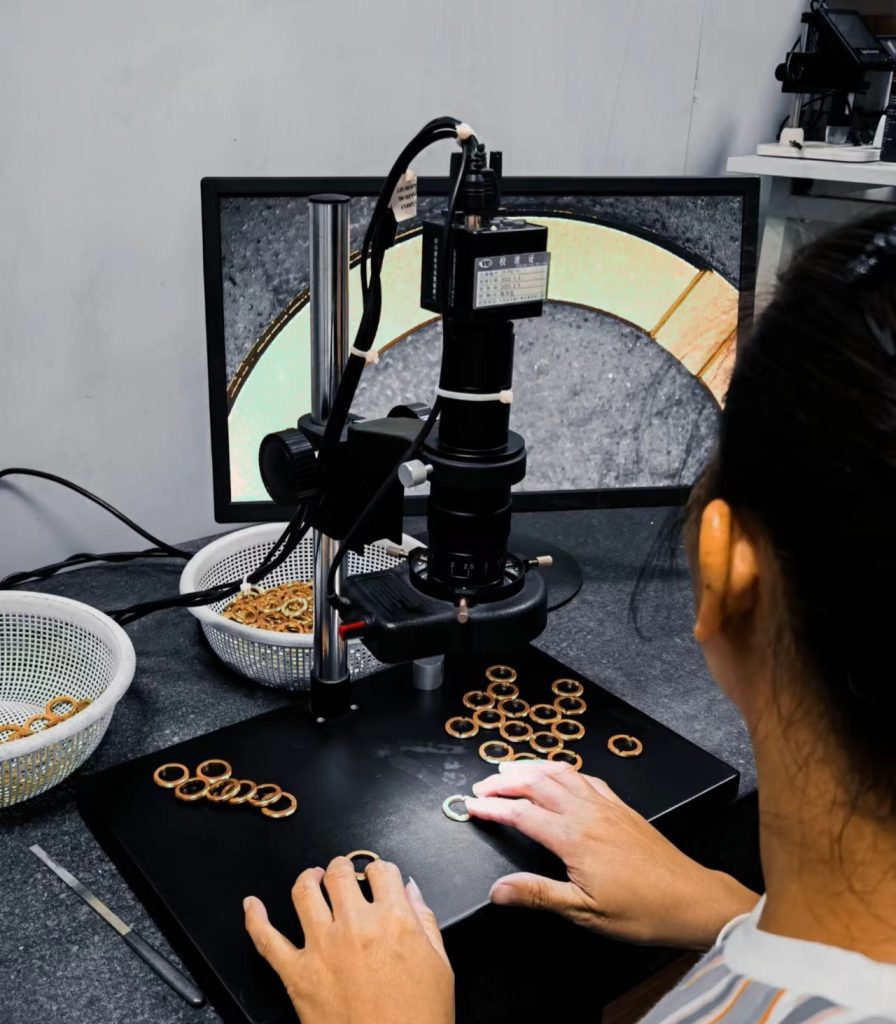
Consistent visual Inspections are carried out to ensure the parts match the models, have the required Surface quality, contain all the features, and are defect-free. Quality control personnel perform a visual inspection for each item.
We provide two different surface finish standards and guarantee them through visual examination. We evaluate the finish to see whether it meets your requirements or not.
Cosmetic: A cosmetic finish is a consistent surface finish without aesthetic flaws on the primary side of parts. It Guarantees the uniform visual of parts.
Non-Cosmetic: This term relates primarily to aesthetic appeal. However, minor visual flaws and surface blemishes may be present.
Constant visual inspection conditions
The quality of surface finish (Cosmetic & non-cosmetic) will be ensured by visual inspection under the following conditions.
| Distance | 50 ± 10 cm with a correct vision |
| Angle | 45± 50 along all directions |
| Lighting | 500-1000 Lux, Neutral white colour |
Quantification of cosmetic surface quality
We check the surface to ensure that there are no scratches, scuffs, staining, blemishes, hanging marks, or other minor imperfections on the surface. After that, we examine the following factors to verify that parts from each batch are aesthetically consistent.
- There is no difference in surface colour among the identical parts.
- For surface polishing (sanding or brushing), we use the same grit and ensure the brush marks go in the same direction.
- Gloss units are uniform across the batch.
Process requirement
- The same manufacturing procedure, setup, and instructions are used for the whole batch. However, it might merely be changed to raise the quality.
- Raw material from the same batch will be used to maintain uniform properties.
- The pieces won’t ever contact each other after they’ve been cleaned and de-greased.
- The same grit of sandpaper will be used in the same direction for the primary surface polish. In the case of bead blasting, all parameters will be the same.
- All batch parts will undergo secondary surface finishing simultaneously within the factory.
- Workers will wear gloves to prevent fingerprints and other markings on the surface. In addition, we believe pieces should be packaged one by one.
Parts cleaning & protection
Primary cleaning
We follow the same process for primary cleaning of parts from corrosive and non-corrosive material that involves removing dust, oil, chips, burrs, and sharp edges of parts.
- Sharp edges will be chamfered with a size of 0.25 ±0.125 mm, maintaining a uniform appearance.
- Hand tools will be used if we find chamfer the small edges difficult with a machine tool.
- Deburring will apply to internal threads, bores, and blind holes with the help of deburring tools.
As we offer the deburring standard of 0.25 ±0.125 mm, please specify if your parts need to be deburred beside this during the quote request. Our engineers will consult you before proceeding with the manufacturing. We have two options;
- Deburring + Sharp edges
- Deburring + Rounded Edges
Protection
Non-Corrosive Materials
Parts from non-corrosive materials such as plastic and fibres get de-greased after machining, so go with a simple cleaning process with alcohol. While proceeding with cleaning, if the inspection team found chips, burrs, and cutting fluid marks on the surface, they reject those parts and send them to the primary finishing stage.
Corrosive Materials
Parts will be cleaned by dipping them in corrosion inhibitors such as WD 40 and ITW RP 631oil to prevent corrosion. These forms of inhibitory oils will create a thick surface covering.
Parts will then go through multiple layers of packing to protect them. We won’t use multilayer packing immediately; the first parts will be vacuum-dried.
Quality Inspection Report
Inspection Confirmation
Inspection Confirmation
We inspect before proceeding with the shipping process to ensure visual and dimensional perfections. We follow our standard defect book and inspection criteria to perform inspections.
- We follow the SO2859 – General Level 2 sample for the inspection, indicating that a sample of 10 units from a batch of 40 units will be examined.
- We use pictures and charts with different levels to classify the defects.
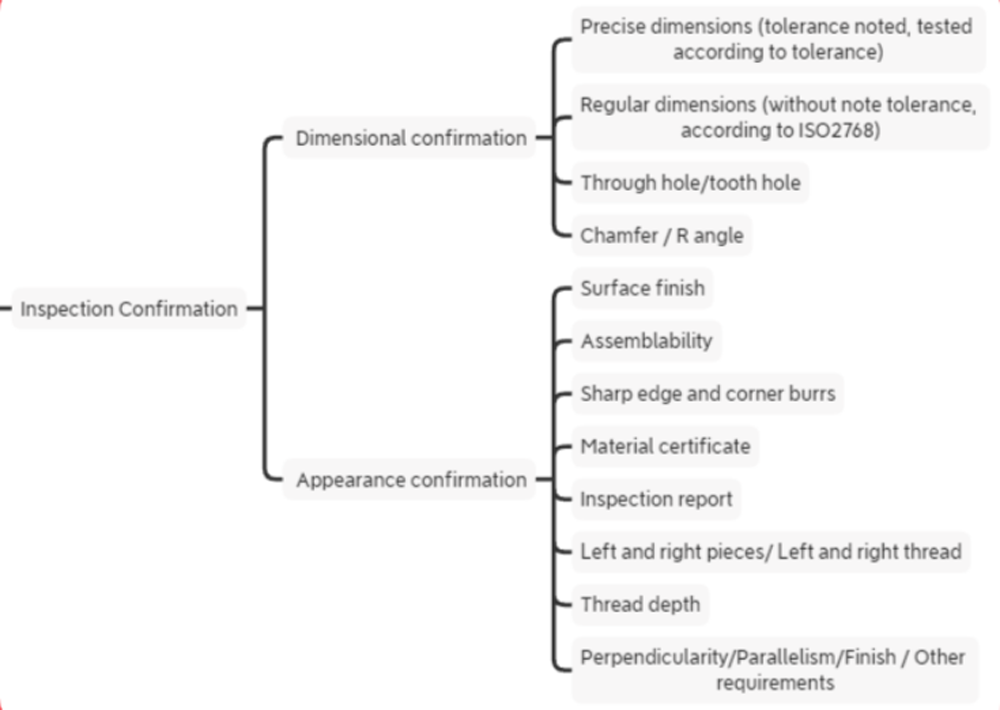
Dimensional and appearance confirmation
We compare the parts by checking five criteria and standard pictures;
| Five Criteria | Surface finishes, Tolerances & dimensions, Threads, Materials, Parts finishing and cleaning, and Packaging. |
|
Comparison with pictures |
|
Our standard defect comparison books have guidelines that specify the Level of the defect (AQL: Cr 0 M 2.5 m 4: Acceptable quality level is 2.5%, which means up to among the samples, 2.5% defective pieces are acceptable)
We considered a discrepancy according to the customer’s requirements and technical standards.
- Minor defects: Negligible effects on the aesthetic appeal but no effect on the functionality of parts
- Major Defects: Can cause disturbance for parts during assembly or in end-applications
- Critical defects: These not only affect the functionality of parts but can cause harmful or hazardous situations during end-use applications.
We will communicate the outcome to the customer for possible disposal if the parts do not satisfy the customer specification or Prolean standards.
Quality documentation
To assure the quality & standards of parts, we provide different certificates along with the delivery.
- Certificate of Conformance
- Risk of Hazardous Substances(RoHS )Certificates
- REACH Certificate
- Material Certificates
- Material Test Report
- Dimensional Inspection Report (CMM)
- First Article Inspection (FAI)
OUR CMM Machine
Once the parts are produced, we offer all these certificates with shipment information.
Certificate of Conformance: A conformance certificate ensures that orders are delivered following Prolean’s specifications and technical requirements.
RoHS Certificates: It is a legal requirement in most countries, including the European Union, because it is an international standard of Risk of Hazardous Substance (RoHS) certification. It certified that neither the production process nor the finished parts contain hazardous substances (Cadmium, Lead, Mercury, Hexavalent chromium, Polybrominated Biphenyls &Biphenyl Ethers, DIBP, DEHP, BBP, and DBP). Furthermore, it ensured that we had created the components with complete accountability.
REACH Certificate: This certification is similar to RoHS, except that only up to 0.1% of hazardous materials, including packaging, may have been used throughout the production process.
The REACH Regulation is another international legislative requirement.
Material Certificate: It is given to certify that the production material complies with the customer’s specifications and requirements. We offer material certification for all the materials we offer (100+).
Material Test Report: It is the certification that all the required mechanical & chemical properties (Chemistry testing, tensile test, & hardness test) follow the customer’s material specification. We provide material test reports for only metals and are done with third-party labs.
Dimensional Inspection Report: It is one of the quality reports which certifies that all the parts are created while maintaining the specified dimension & tolerance range.
Customers need to provide the following information for the Dimensional Inspection Report.
- Critical dimensions ( In technical drawings)
- Parts required to be inspected
- Batch size
We use a CMM machine to create the Dimensional Inspection Reports automatically. However, if dimensions are not reachable by CMN, we perform using manual tools.
First Article Inspection (FAI)
We provide First Article Inspection (FAI) for mass manufacturing projects to guarantee that parts meet specifications. Customers approve the FAI reports, and we continue the full-scale production.
Every manufactured characteristic of a component or assembly is recorded in an FAI report and its reported measurement. A sample from the initial manufacturing batch was the basis for all measurements and requirements.
The documentation for First Article Inspection (FAI) contains the following items.
- Report on Material Tests ( Material Certificates in case of plastics)
- A flowchart outlining the production process
- A flowchart outlining the production process
- Production Control Plan
- Parts Acceptance Letter
After getting the FAI report, the customer will have one week to respond. Where the customer can approve, report the quality dispute, and decline the request (only have to pay for sample sets).

