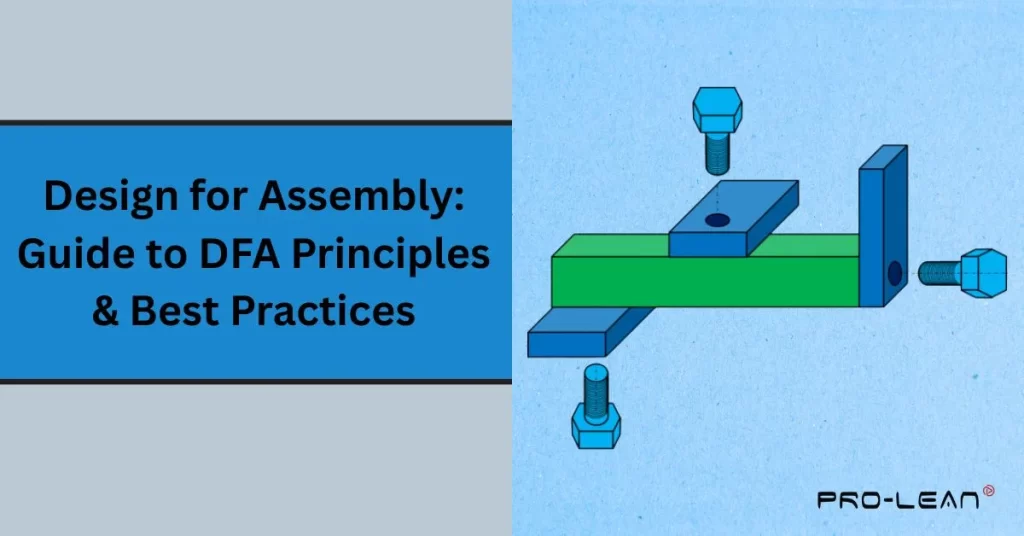
Design for assembly
Do you struggle with time-consuming assembly processes? Are your products too complex or require many parts? Design for assembly solves this problem by optimizing the product design.
It is a systematic method that simplifies the construction of products. This reduces assembly times, lowers costs, and improves the quality of products. DFA principles are applied early in the product design phase to create easier-to-build products. DFA is important whether you are designing consumer electronics or automotive components.
ProLean Tech is a leading company that specializes in expert sheet metal fabrication. We optimize our clients’ designs to ensure efficient assembly and manufacturing. Custom sheet metal fabrication is also available to meet your needs. This guide is a comprehensive overview of design for assembly and best practices.
What is Design for Assembly (DFA)?
What is design for assembly?
Definition
Design for Assembly (DFA), a method that simplifies product construction, is an important part of the DFA methodology.
How DFA Improves Costs and Quality
It analyses how the parts fit together in the manufacturing process. Its goal is to reduce assembly time, costs, and complexity.
History and Industry Adoption
DFA was developed in the 1980s as manufacturers sought to gain a competitive advantage. The engineers realized that design decisions had a dramatic impact on production costs. Simple design changes can reduce assembly times by up to 50%. This realization led to the formalization of DFA methods.
DFA Engineering considers the assembly process as a whole during design. It considers the part orientation, insertion directions, and handling requirements. Engineers pose critical questions regarding the necessity and design of each component. Can we combine this component with another to eliminate it? Can we make the part easier to handle or install?
Core DFA Principles
Core principles of design for assembly
Reduce the Number of Parts
Reduced part counts are the most effective DFA strategies. Fewer parts mean fewer assembly operations, and therefore lower costs. Every part eliminated reduces the need for handling, storage, and quality control.
When functionally possible, assembly guidelines suggest combining parts. By molding plastic parts with features directly onto them, separate fasteners can be eliminated. Snap-fit connections reduce the number of parts by a significant amount.
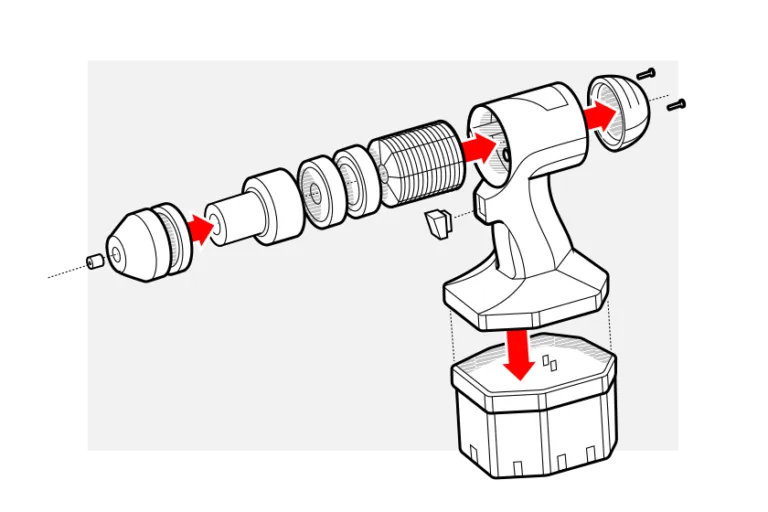
Design for Top-Down Assembly
The assembly of products designed to be assembled vertically, from the top down, is much easier. Gravity helps with part placement, reducing fixture requirements. Workers can drop or place components without complex positioning.
Avoid designs that require parts to be held while assembling. Self-locating components keep parts in their correct positions without the need for human assistance. Orient the parts so that they fall into their correct positions.
Standardize Parts and Processes
The inventory becomes simpler when parts are used that are standard and common across many products. This simplifies training and also reduces the possibility of error. Workers quickly become familiarized with assembly procedures.
Standard fasteners are less expensive and more readily available than alternatives made to order. Standard sizes require fewer tools and, therefore, less time for changeover. Standard hardware is a great way to improve the metal parts assembly.
Eliminate Adjustments
The assembly of products that require adjustment takes longer. Each adjustment increases the time required to build a product and introduces possible variations. The goal of design for assembly is to eliminate all adjustments.
Use tolerances that allow parts to be assembled without the need for selective assembly. Self-aligning features automatically align components. If you must make adjustments, they should be easy to understand.
Simplify Part Handling
Faster assembly is possible with parts that are easy for you to insert, grasp and orient. Handling small, fragile, or flexible components is difficult. DFA Engineering considers the part weight, size, and geometry.
Design components with features to prevent incorrect orientation and insertion. Asymmetric shapes guide the correct placement of parts during assembly. Avoid handling parts that tangle or nest together.
DFA vs DFM: Key Differences
| Category | DFA | DFM |
| Focus | Assembly process | Manufacturing process |
| Goal | Reduce part count and simplify assembly | Reduce cost and complexity of making each part |
| Main considerations | Part fit, orientation, handling, joining | Machining steps, tooling, material choice |
| Used when | You want faster assembly and fewer errors | You want lower part cost and simpler production |
| Benefits | Shorter assembly time and fewer assembly tools | Lower manufacturing cost and faster production |
| Risks if ignored | Easy parts may still be slow or complex to assemble | Parts are cheap but hard to assemble later |
| Best approach | Start early in design to avoid unnecessary parts | Apply after DFA to refine remaining parts |
When to use DFA?
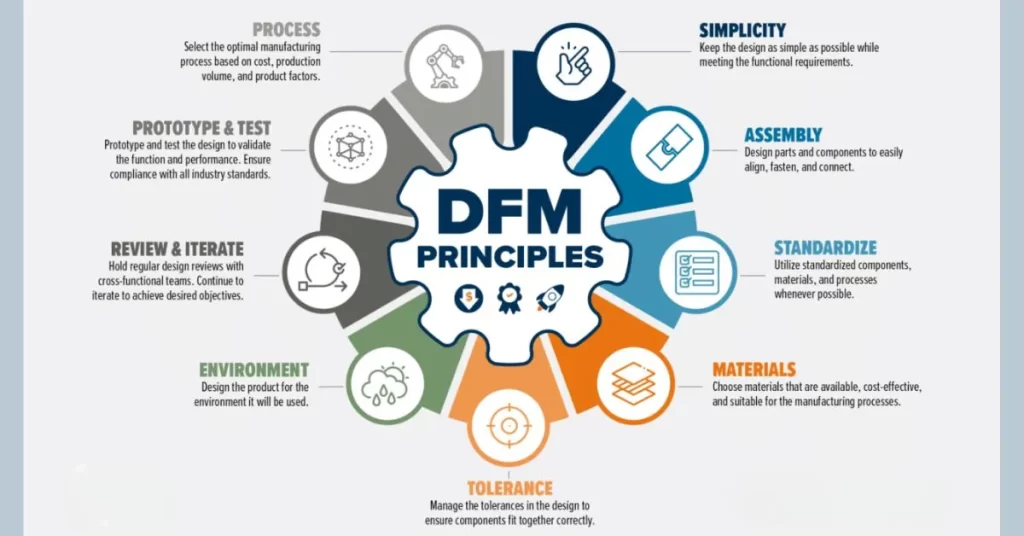
DFM and DFA have different goals. Design for Manufacturing (DFM) optimizes the way individual parts are manufactured. Design for assembly is concerned with how well parts fit together.
When to use DFM
DFM takes into account machining processes and tooling requirements as well as material selection. The goal is to make the production of each part simpler and cheaper. The design for assembly takes into account the overall construction of a product.
Integrating Both Approaches
Most successful products combine DFM and DFA. Easy to make but hard to assemble parts defeat the purpose. A part that is easy to assemble but expensive to manufacture is not optimal.
Start by using DFA principles to reduce part count and simplify assembly. Apply DFM principles for the remaining parts to optimize their manufacturing. Total product cost includes materials, assembly, and manufacturing labor.
The Key DFA Methods and Techniques
Techniques of DFA
Part Count Analysis
Ask yourself three questions to evaluate each part. Does this part have to be present for the product’s function to work? It must move in relation to other parts when it is operating. It must be made of a material different from adjacent parts. Consider eliminating the item if you answer no to all three. Create a matrix of all the components to reduce part counts. As you make changes to your design, track the progress.
Assembly Time Estimation
Calculate the minimum theoretical assembly time of your current design. As a general rule, assembly guidelines recommend 3-5 seconds for each part. Multiply the number of parts by this time in order to determine the minimum assembly duration.
Comparing actual assembly times to the theoretical minimum time previously calculated. Continually track assembly time metrics during the entire design process. Set time-reduction goals for every design iteration.
Snap Fit Design
Snap-fit design eliminates separate components by using integral features. Plastic parts may incorporate beams that deflect when assembled. Once they pass the retention point, these parts spring back and hold firmly.
Snap-fits are a cost-effective solution for large-volume production. Calculate the required deflections and stresses to prevent failure. Lead-in angles should be sufficient to ensure easy initial engagement.
Tolerance Stacking
The analysis of tolerance stacking prevents problems with fit caused by accumulations. Tolerances are combined mathematically when multiple parts are connected in series. When tolerances are not managed properly, they can lead to excessive gaps or interference.
Early on, perform a statistical or worst-case tolerance stack-up. Slip fit tolerance tables are useful for standard clearance fittings. By selecting the correct tolerance, you can eliminate adjustment and improve quality consistency.
Try Prolean Now!
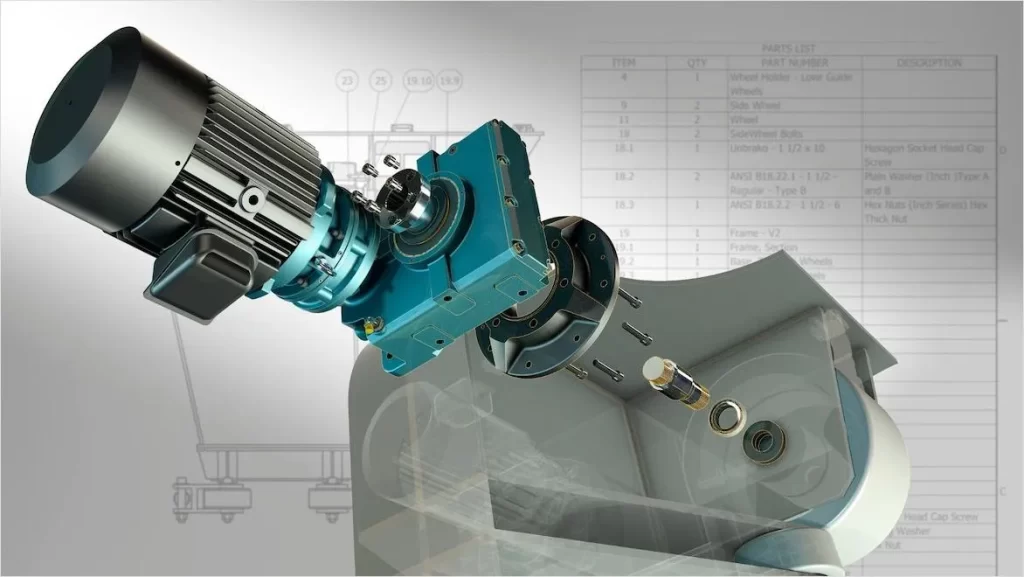
Sheet Metal Assembly Considerations
Design for assembly considerations
Joint Design
Sheet metal assembly presents unique challenges requiring specific DFA considerations. The joint design of thin materials and the selection of fasteners are critical. Designing properly prevents distortion, buckling, and cosmetic issues.
Consider joining with mechanical fasteners, welding, riveting, and other methods. When selecting removable or permanent joints, consider the disassembly needs. Material thickness should be sufficient to support the fastener load without deformation.
Bend Relief
Bends in sheet steel create stress concentrations that affect assembly. To prevent material from tearing, design adequate bend relief. Avoid distortion in manufacturing by placing holes far from the bend lines.
Place the hole in relation to the assembly operation and access required. Holes that are used to align components during assembly can improve consistency by a great deal. Design parts to avoid bends that interfere with the mating of components during assembly.
Tab and Slot
Tab and slot joints are self-locating assemblies for sheet metal. Tabs on one part fit into slots in the other part. This design eliminates the need for separate fasteners and increases assembly speed by a significant amount.
Tabs should be designed with enough length to ensure secure engagement. Tabs should have chamfers to facilitate initial insertion. Calculate tab thickness in order to achieve an adequate retention force while avoiding excessive insertion forces.
Welded Assembly
The design of the weld joint has a significant impact on assembly time and consistency. Position welds are to be easily accessible by operators and welding equipment. Reduce weld length, while still maintaining joint strength.
Self-fixturing features are designed to hold parts in the correct position during welding. Tack welds can be used to keep alignment in place during final welding. Be careful to avoid distortions caused by heat during welding in thin materials.
Assembly Guideline Best Practices
Best practices for design for assembly
Assembly Guidelines
Assemble all components in the same direction. When it is functionally feasible, top-down assembly should be used. This reduces fixture complexity and minimizes the need for part reorientation.
Group operations according to direction if multiple assembly directions cannot be avoided. Avoid using designs that require assembly from the sides or bottom whenever possible.
Self-Locating Features
Self-locating features automatically guide parts to the correct position during assembly. The alignment tabs, pins, holes, and chamfers reduce the guesswork of operators. These tabs also help to prevent the incorrect assembly of products that can damage them. Use generous lead-in chamfers to design mating features for easy engagement. Pilot features can be used to engage components before they are fully seated.
Symmetry/Asymmetry Rules
The orientation of symmetrical parts does not matter. The assembly process is not slowed down by the need to correct or check part orientation. Asymmetry should be made very obvious when symmetry is not possible. Features that prevent incorrect placement or insertion attempts.
Fasteners Minimization
Multiple fastener types increase inventory complexity and assembly times. Assembly guidelines recommend that you use the fewest types of fasteners possible.
Standardize one or two types of fasteners across the entire product. As much as possible, use the same fasteners in all parts of your assembly.
Design for testing
Quality assurance requires that products be tested before or after assembly. Design test points to be easily accessible, without the need for disassembly. This will reduce testing time and help prevent damage during the test operation. Include features that enable functional testing before final assembly closure. Design the product so that defects can be detected by visual inspection only.
How to Implement DFA in Your Design Process
Early Design Integration
Design for assembly should be considered from the beginning. DFA works best when it is considered at the beginning of concept development. Late-stage modifications are costly and often restricted by previous decisions.
Regularly include manufacturing and assembly personnel during early design reviews. To validate early design decisions, create assembly mockups and prototypes. Models reveal assembly issues that aren’t apparent in CAD.
DFA Analysis Tools
Commercial software tools are available to automate engineering calculations and analysis for DFA. These tools estimate assembly times based on geometry and part count. These tools also offer specific suggestions to reduce assembly complexity.
The manual DFA uses worksheets that are structured to carefully evaluate each part. Benchmarking your designs with industry standards or competitive products is a great way to benchmark.
Organization Training and Culture
To implement DFA successfully, everyone in the organization must be committed and understand its benefits. Designers, engineers, and managers should be trained on DFA benefits and principles. Show examples of how DFA has improved products in the past. Regularly celebrate and share DFA success within your organization. DFA metrics should be incorporated into your design review process.
Try Prolean Now!
Common DFA Mistakes
Some common errors can happen during the DFA. Such as:
- Over-optimization
- Ignoring downstream effects
- Mismanagement of tolerances
Over-Optimization
Avoid sacrificing product functionality for a small improvement in assembly time. For maintenance, replacement, or functionality, some parts need to be kept separate. Always balance DFA principles with other important product requirements. Take into account the entire product lifecycle and not just the initial assembly. Consolidation can save you money, but only if it is done in the right context.
Ignoring Downstream Effects
Changes in design that simplify assembly can complicate other operations. Be sure to consider the effects of changes on shipping, installation, and field service.
By taking a holistic approach, you can avoid solving one problem and creating another. Examine the impact of changes in design on quality control and testing procedures.
Take into account how the changes will affect your vendor relationships and supply chain.
Tolerances Mismanagement
Even the best design of an assembly can be undermined by poor tolerance management. When parts don’t fit correctly, they need to be adjusted or reworked during assembly. To ensure consistency, apply the proper tolerance stacking to all critical dimensions.
Consult the slip fit design table standards to determine tolerances for shaft and hole combinations. Consider the cost increase that tight tolerances will inevitably cause.
Measuring DFA Success
KPIs
Over time, track the total number of parts as your DFA metric. Reducing part counts almost always leads to a dramatic improvement in assembly efficiency. Set specific targets for every product generation or revision. In production conditions, measure the actual assembly time per unit. As quality indicators, monitor assembly error rates as well as rework needs.
Cost Metrics
Calculate the total labor cost per unit, including all operations. Include the time required for handling parts, insertion, fixing, and quality checking. Labor cost reduction impacts the profitability and competitiveness of products directly. Consider the total cost of manufacturing, which includes materials, processing, and assembly. In your analysis, consider the investment needed to implement changes in design.
Customer Quality Metrics
Quality indicators include warranty costs, failure rates in the field, and quality indicators. Products that are simpler to assemble have fewer defects in general. This correlation shows that DFA has an impact on assembly costs beyond DFA. Monitor customer satisfaction metrics relating to product reliability and quality. Monitor the time required to install or set up a customer’s product.
Conclusion:
It is crucial to design for assembly in order to compete on the market today. It improves the quality of products, reduces product development cost, and accelerates time-to-market. By applying DFA principles at an early stage in the design process, you can maximize these benefits by using fewer components and simplifying assembly operations. DFA implementation is only possible with the commitment of your entire organization and proven methodologies, and assembly efficiency. Investment pays off through lower costs and better quality.
ProLean Tech provides expert design for assembly and manufacturing services to clients worldwide. DFA principles help us optimize your product designs to ensure cost-effective, efficient production. Our team has DFA knowledge and expertise combined with custom sheet metal fabrication, advanced sheet metal fabrication, and sheet metal fabrication. ProLean Tech can help you reduce manufacturing costs by reducing your design for assembly requirements. Contact us today to get a quote.

0 Comments