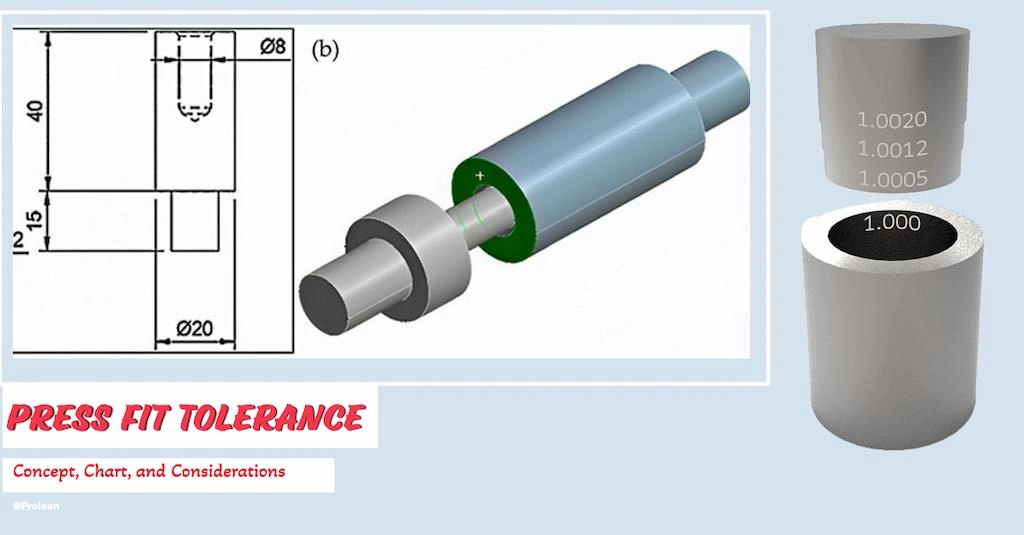
Fits are critical engineering features in the mechanical assembly, defining the mating condition of the hole and shaft, press fits are one of the main types. A pressure fit involves applying pressure to the shaft so it fits inside the hole with slightly less nominal dimension( typically diameter). Consequently, press fit tolerance defines how much larger is the shaft or inserting part compared to the hole dimension.
Press fit tolerance is important for dimensional control between mating parts to achieve an interference fit. So, the friction and stress between mating surfaces hold the joint without any fastening.
This article will serve as a fundamental guide for press fits of CNC machining or other manufactured parts, discussing its concept, press fit tolerance chart, influencing factors, and GD&T of pressure fits in engineering drawings.
What is Fits in Mechanical Engineering?
In mechanical engineering, fits are the dimensional relationship of mating parts (like a hole and a shaft). They describe the range of allowable variations in dimensions. Consequently, there are three types of fits in engineering.
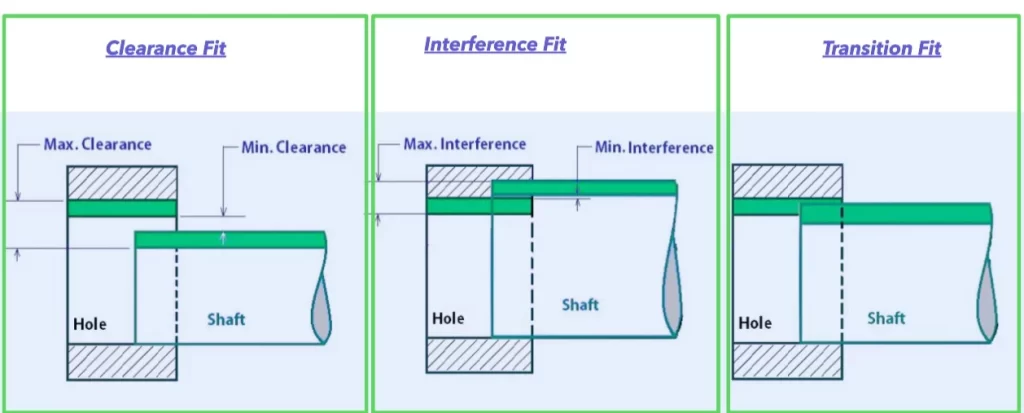
Types of fits in engineering
- Clearance Fits: The inserting item with a slightly less dimension, leaving a gap between the mating surfaces.
- Interference Fits: The inserting part with slightly higher dimensions, creates an interference between mating surfaces. However, the change in dimensions should be within a specific range for the perfect interference fits, typically defined by the pressure fit tolerances.
- Transition Fits: A combination of transition and clearance fits.
Tolerances are critical for any type of fit listed above, each has a different type of symbols in CNC machining drawings and methods to obtain during assembly. For example, a hammer is used to create the interference fits (or press-fits) in simple & small hole-shaft assembly.
Pres Fit and Press Fit Tolerance
In an engineering press fit, the external diameter of the inserting part is larger than the internal diameter of the hole or grooves that are mating with the inserts with pressure. Meanwhile, their tolerance influences the bonding between them.
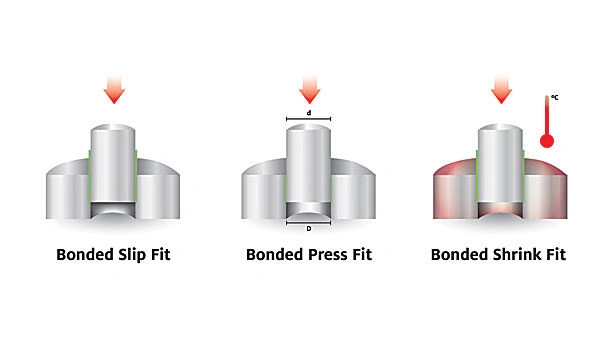
Press fit applying methods
It is essential for manufacturability and functionality. For instance, the shaft may have a diameter tolerance of +0.01 to 0.02 mm, whereas the bore may have a tolerance of −0.01 to 0.02 mm to create the interference necessary for the press fit.
The ISO Standard (ISO 286) involves two ways of press-fit tolerancing, Shaft-based( constant size of shaft) and Hole-based tolerances ( constant hole size), represented by symbols like p6, H7, etc. These symbols combine a tolerance grade and deviation to define precise dimensions for holes and shafts.
Press Fit Tolerance Chart
To ease the manufacturability and assembly, international standards are used during the design and tolerancing of the mating feature. For this, the press fit tolerance chart is the tool for designers and manufacturers, helping to ensure the correct tolerances. ANSI tolerance charts are the most common among different word-wide accepted standards.
A press fit tolerance chart is a tabular format ( sometimes graphs) illustrating nominal sizes and permissible deviation ranges for tolerances. Based on required interference, designers and engineers can choose different tolerance grades for holes and shafts.
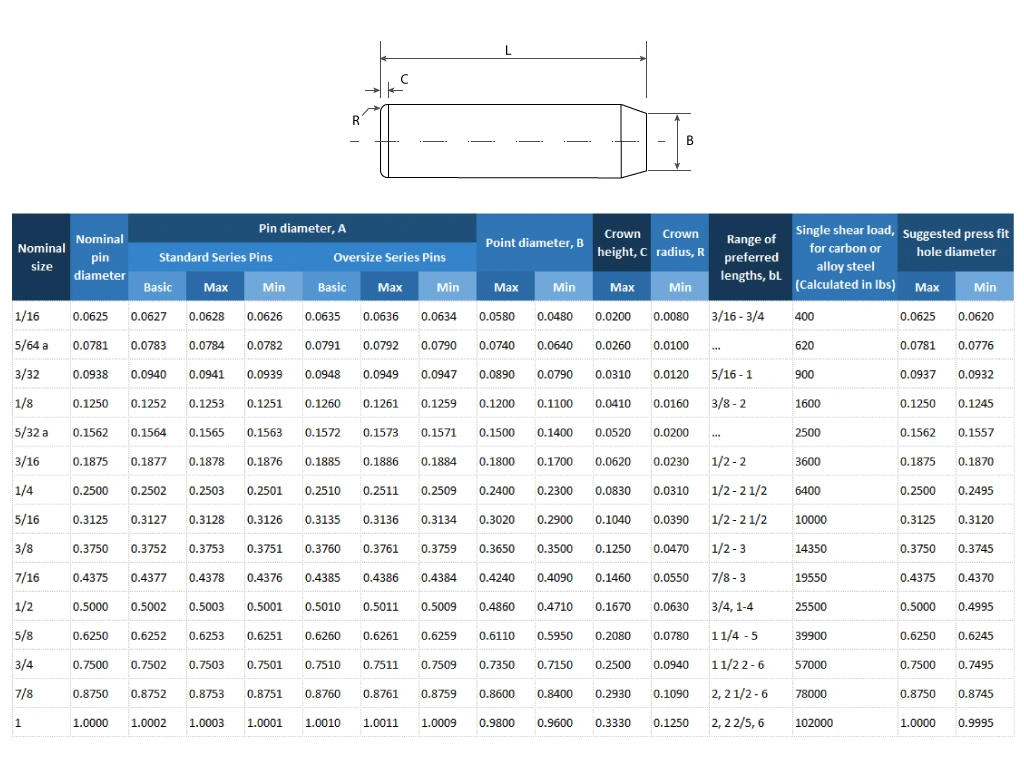
Example of tolerance chart
Considerations for Press Fit Tolerancing
Choosing the right press fit tolerances requires consideration of material properties, thermal restrictions, lubrication, and pressuring methods for fitting. Let’s briefly elaborate on the key considerations;
- Properties of Material
Consider mechanical strength, elasticity, ductility, and other properties to choose the right range of tolerances for press fit joining. Typically, harder material requires tighter tolerances as they have low formability. The press fitting is about the deformation of mating surfaces, the forces push mating insert into holes, cavities, or grooves that deform the material radially outward.
- Thermal Expansion
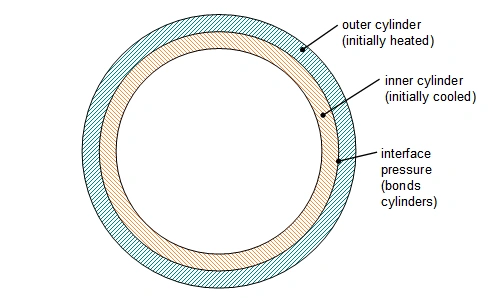
Impacts of thermal properties on press fitting
It refers to how much the length of the radius increases with pre-degree temperature rise, coefficient of thermal expansion is used to measure this. You need to consider these for the assembly of parts made with dissimilar materials. If the part-receiving feature has higher thermal expansion, the regular tolerances are affected as it expands more than inserting parts. Moreover, it is recommended to use the right temperature for press fit assembly considering the thermal properties of mating components.
- Surface Finish Quality
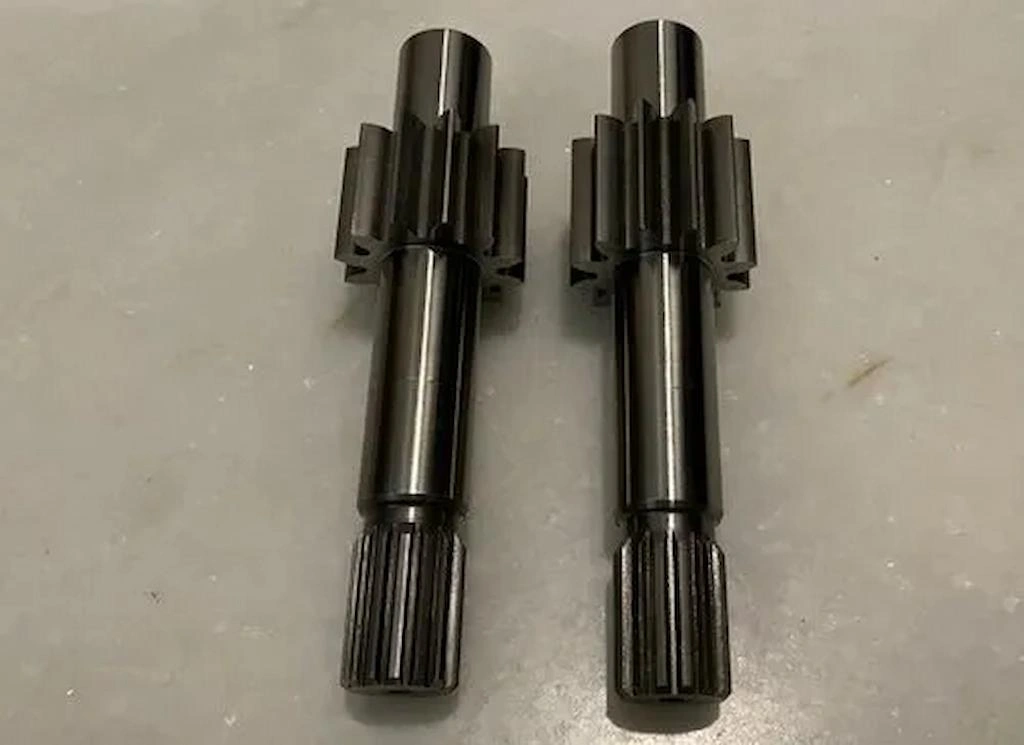
Smooth finish of pump shafts
Whether the parts are CNC machined or produced with other methods, consider the roughness level of mating surfaces. The reason is that surface quality affects friction between the mating surfaces during press fitting. Smooth surfaces produce less friction and the surface elements can be relatively weak. Additionally, you can also apply metal coatings or paintings to adjust the tolerances required to meet the desired interferences between the parts.
Try Prolean Now!
Calculating Press Fit Force
Press fit force is the required force for the shaft(or inserting part) to pass it into the hole, so both components bond together permanently through cold forming. Factors like material type, size of the mating parts, contact pressure, and surface quality affect this force value.
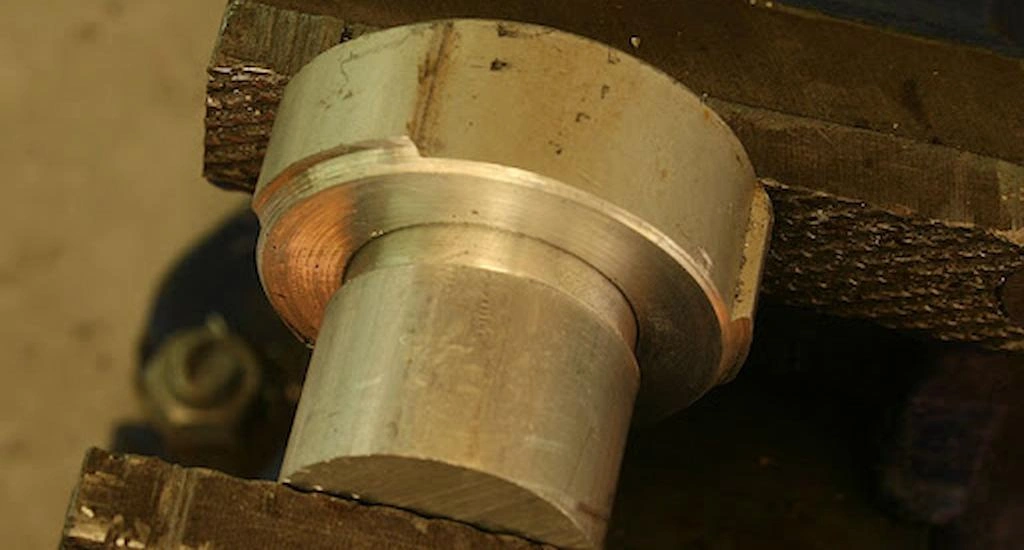
Press fitting with a mechanical press
Using improper force can crack the material, whereas low force fails to achieve the desired joint strength.
You can calculate press-fit force using the following formula;
F=π⋅d⋅L⋅P
Where d is the diameter(mm), L is the interference length(mm), and P is the contact pressure(MPa). You need to find out the contact pressure first;
Contact Pressure=

Where: δ is the interference (δ)= Shaft diameter-Hole Diameter (Dshaft- −Dbore), V is the Poisson ratio, and E is the elasticity of modulus.
Furthermore, you can use an online press-fit calculator to calculate the force. You need to input some related parameters and it gives the results.
Tips for Press Fit Tolerances of Machined Parts
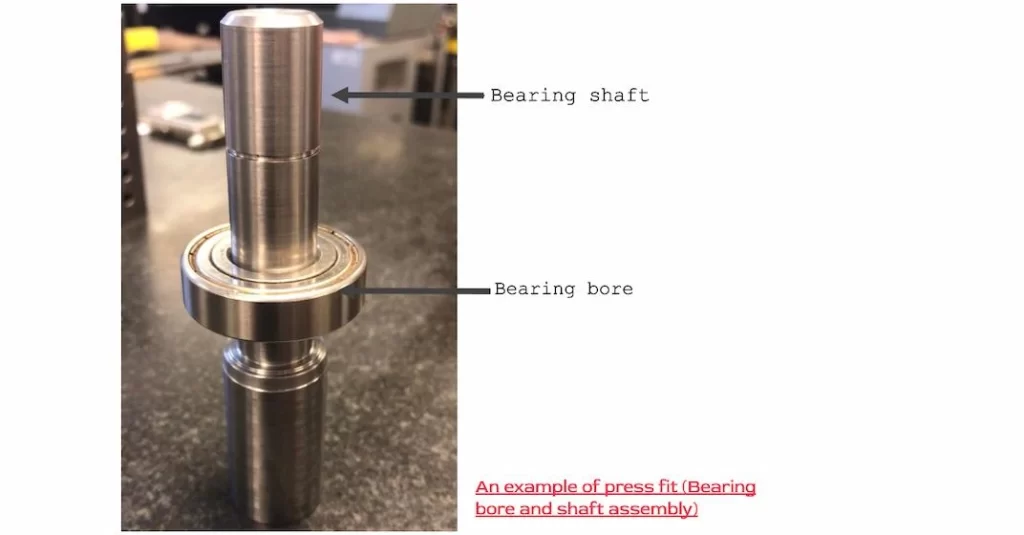
Press fit assembly of bearing and bore
The typical considerations for tolerancing of pree fit joints are as follows;
- Consider the Machining Tolerances
If your parts are machined with CNC for press-fit joints, consider the CNC machining tolerance. If the machining tolerances can not justify the allowable variation for press-fit, adjust the tolerance in the drawing accordingly.
- Distance Between Fitting Locations
If there are multiple press-fit locations in a single assembly, consider the distance between them. Also, consider the axial load for different sets of tolerances and find the optimal value according to the optimal values for force.
- Proper Use of Tolerance Chart
Analyze your design and use the tolerance chart to find out the optimal tolerance press fit that archives the level of interference you want. For this, you need to choose a suitable standard chart(Like ASNI, ISO, etc) and analyze the values for interference matings.
- Lubrication
Lubrication impacts the surface friction, and so does the interface between mating surfaces. So, choose the tolerances based on whether you are using lubrication on interfering surfaces or not.
Try Prolean Now!
How to Measure the Press Fit Tolerance of Machined Parts?
Measurement of CNC machined press-fit components is essential to ensure whether they are within the tolerance limit for the desired interface or not. Gauges, micrometers, coordinate measurement machines (CMM), etc are used to measure this.
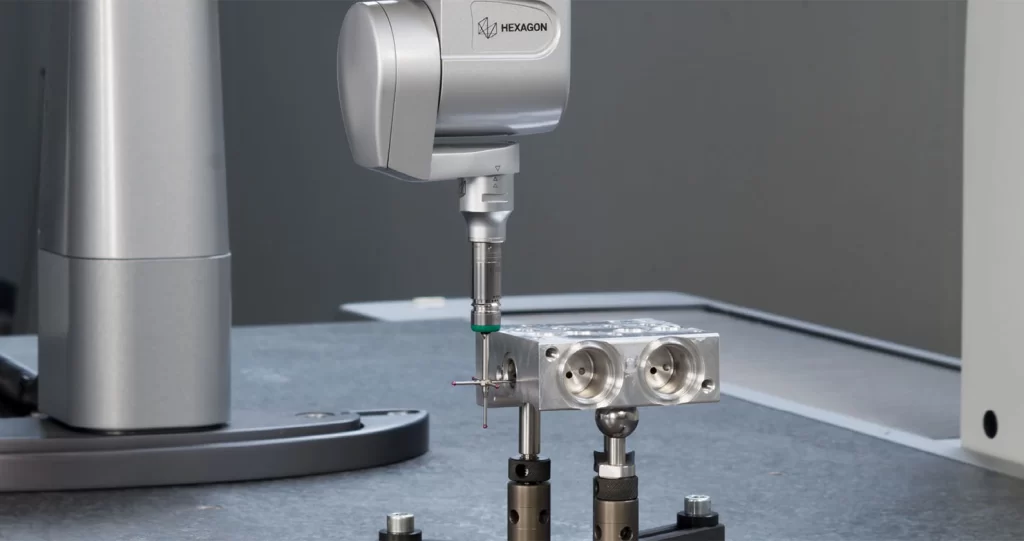
CMM measurement
Subsequently, the following are the common instruments used across CNC machining manufacturers to measure the press fit tolerances;
- Micrometers and Gauges
- Go/ No-Go gauges
- Coordinate Measurement Machines (CMMs)
- Ultrasonic Thickness Measurement Devices,
- Calipers
- Optical Measurements Devices
- X-ray Scanners
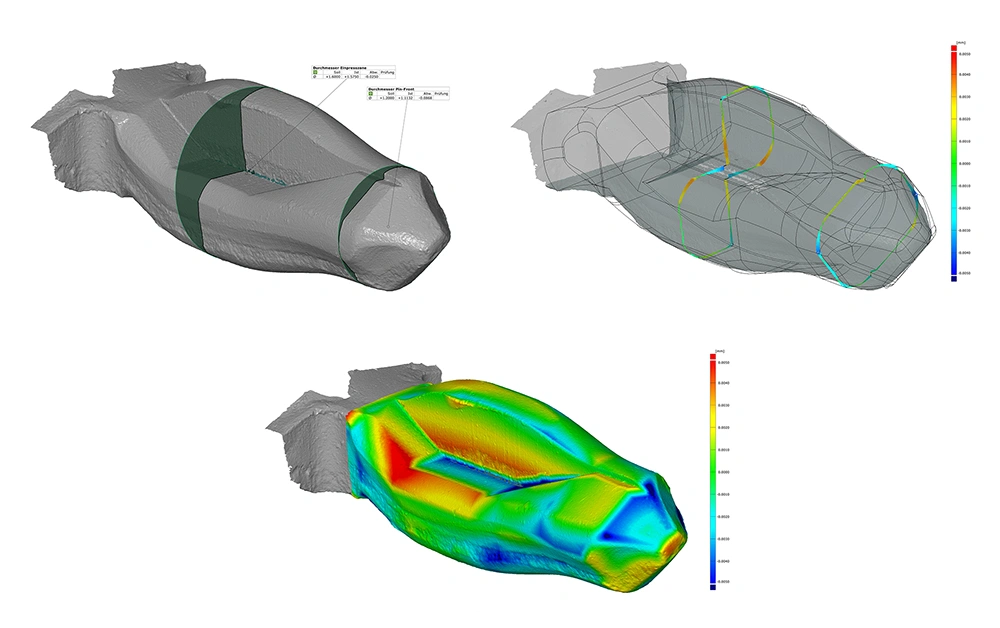
Press fit 3D measurement and analysis in computer software
Moreover, it is advised to choose a suitable measurement method/instrument and verify the requirements with a press fit tolerance table. It ensures that your fitting components are qualified for assembly and provides sufficient interferences for performance.
We Provide CNC Machining Solutions for Assembly Parts
If your products or systems have press-fit and other assembly joints, we can machine your design to meet the desired interface and joint parts. Our Advanced CNC machining facility can achieve tighter accuracy based on required press-fit tolerances for assembly. Additionally, you can leverage the expertise of our engineers to optimize your designs according to the fitting requirements.
So, upload your designs and request a quote for machining service today!
Conclusion
Choosing the right press fit tolerances depends on the material parts made up, their thermal expansion rates, and desired interference while applying the pressure. This is important for achieving permanent joints that can handle the required load strength without affecting the material integrity.
FAQs
What is the main thumb rule for press fit?
The main thumb rule for press fit tolerance is “ There should be a minimum interference between the mating surface for a secure connection, typically 0.001 to 0.002” for every inch of mating diameter.”
Why press fit tolerances are important in mechanical assembly?
The tolerance press fit is important to achieve precise interference between components that prevents slips and avoids material damage during connection. This way, designers and manufacturers communicate about assembly requirements.
What is a real-world example of press fit tolerance?
A common real-world example of press fit tolerance is bearing housing. For instance, the bearing’s outer diameter should be larger than the housing’s bore for a tight fit that prevents the bearing from rotating within the housing during operation.
Are CNC machining tolerance and press fit tolerance related to each other?
Yes, they are related to each other. Yes, CNC tolerances define precise dimensions of machined parts, whereas press-fit tolerances are about allowable deviation from dimensions for required press fits.



0 Comments