“Injection molding is an invaluable fabrication technique for creating stringent quality-controlled part manufacturing. It benefits users by being cost-effective and providing end-use or aftermarket products with short turnaround capabilities.”
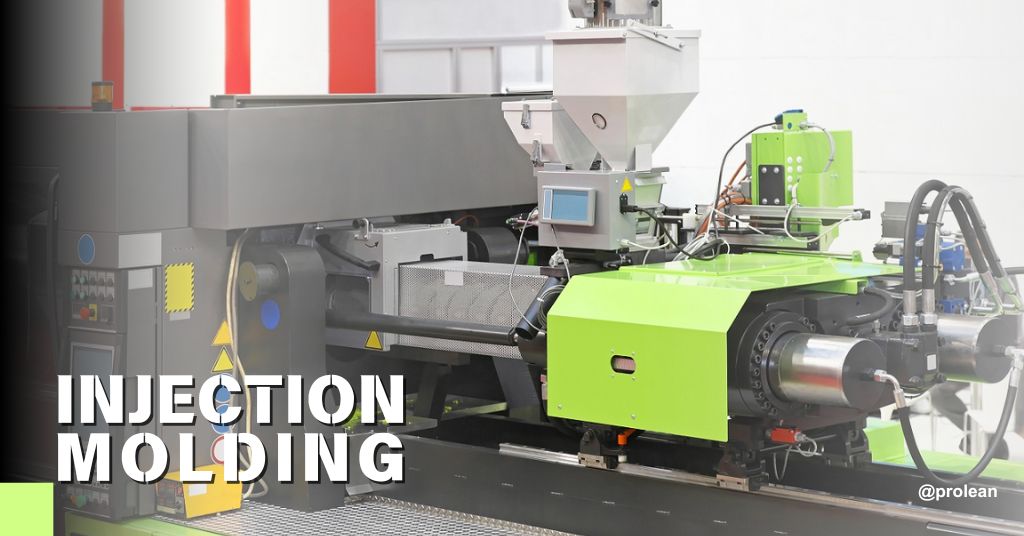
Custom Injection molding is an indispensable process for producing plastic parts in a timely and cost-effective manner. It enables the production of large batches of identical parts or components. Its fine injection molding surface finish is usually advantageous and often makes additional surface treatment unnecessary.
Although the pre-coloration of pellets may reduce the post-molding painting or tinting process, the need for different surface finishes may arise. These finishes vary from simple straight polishing to more complicated types of treatment. Multiple companies have their requirements and needs; some focus on smooth finishes for their products’ appearance, while others are interested in roughness or texture surfaces for parts or product durability. The Society of Plastics Industry (SPI) has outlined many surface finishing grades in this context.
These are specific to the material and application of intended use. There are several surface finish options for custom parts, fabricated through the injection of plastics into molds. On the other side, some applications are designed with plastic glossy finishes for aesthetic reasons, while some are for rougher finishes for mechanical robustness or cost-effectiveness prospects. The SPI has developed a set of industry standards for plastic molding surface finishes. These standards, termed SPI finish designations, are divided into four groups of 12 surface finish types, ranging from smooth to rough textures. This article demonstrates the injection molding surface finish standards, common injection molding defects, and quality control measures for molded products.
What is Injection Molding Surface Finishes?
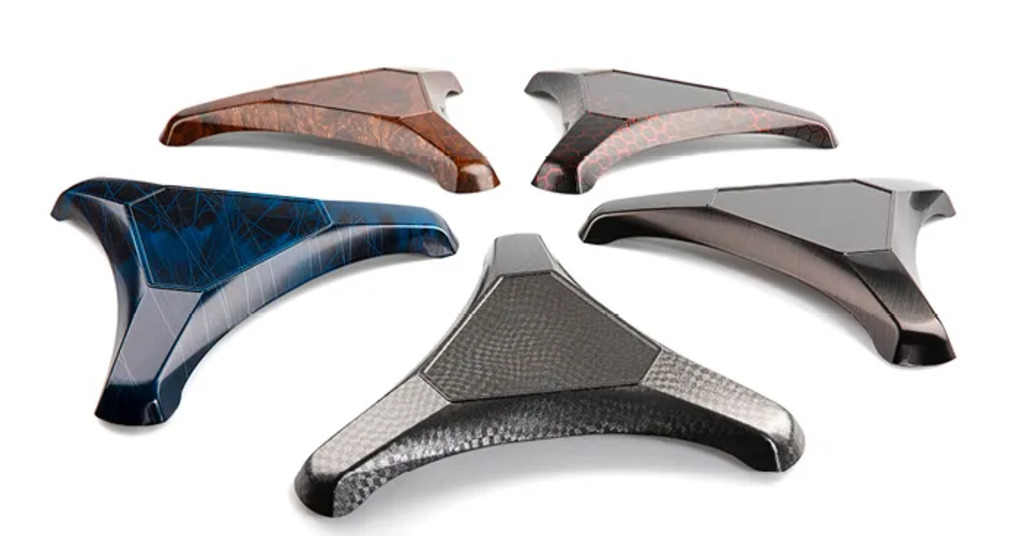
Injection molding surface finishes
When it comes to what is injection molding, in actuality. The answer is in its ability to produce uniform standard quality parts quickly. The surface finishes of the injection molding are the additional processes applied to plastic parts after molding to enhance their appearance or functionality. These finishing procedures include surface texturing, created to give the injected molded objects a specific look, texture, or feel; therefore, they have aesthetic and functional functions.
Different surface finishes can be achieved by plastic molding, and each of them has its benefits. For instance, a smooth surface finish that a famous plastic injection molding company gives can be a factor that will enhance the part’s performance. On the other hand, textured finishes can cause an increase in grip and tactile sensation, resulting in a satisfactory user experience. The selection criteria for appropriate surface finish is a crucial stage in product completion since it determines the final product’s appearance and usability.
Try Prolean Now!
The SPI Injection Molding surface finishing Standards
The SPI surface finish types are as follows:
Grade A: The glossy surface finish of Injection Molding
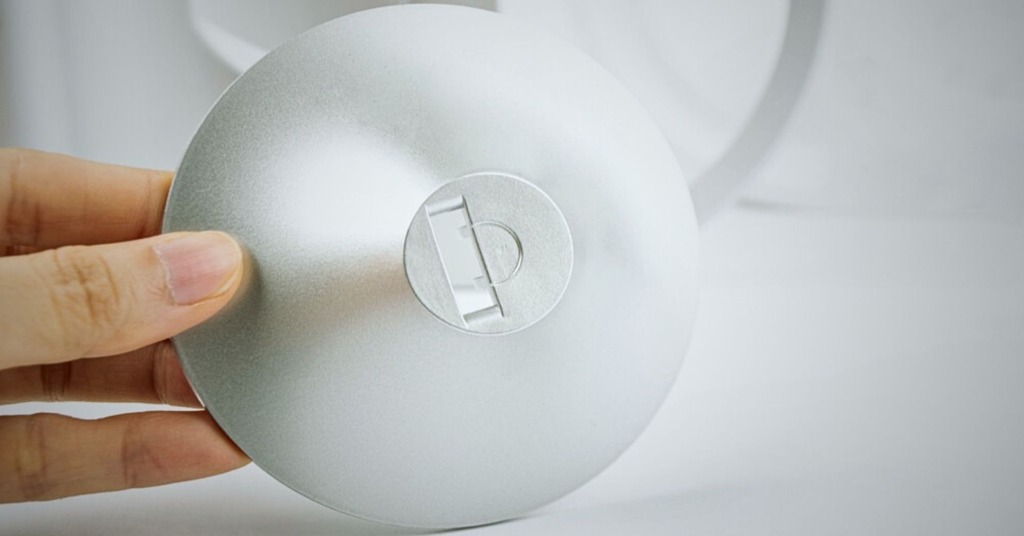
Gloss Injection Molding Finish
Minimum roughness: 0. 012 μm.
This finishing category is achieved through specialized processes like diamond buff polishing, which often produces high gloss levels. Manufacturers meticulously can polish injection-molded parts to a shiny finish by employing work wheels with loose abrasive materials. However, Teflon injection molding products or materials such as acrylic and PC can be easily buffed to form a smooth surface, materials of high abrasion resistance, such as TPU, present challenges in achieving such a glossy finish.
Grade B: Semi-glossy injection molding surface finish.
Minimum roughness: 0.05 μm
Generally, it’s suitable for parts that require a moderate gloss level. The grit sandpaper techniques of grade B finishes are employed for this purpose. This method provides ease of work with a wide range of plastics, including engineered-grade plastics used for injection molding. In addition, these parts are alluring and suitable for consumer applications.
Grade C: Matte Injection Molding Surface Finish
Minimum roughness: 0. 35 μm
The grit sanding process usually produces high-resolution matte finishes by removing machining marks without adding gloss. This finishing option is well-suited for parts that are not aesthetically significant but require a consistent surface texture. This process helps ensure a high-quality mold surface texture devoid of any visible marks or divots. The stone polishing technique is generally suitable for most injection molding plastics.
Grade D: Textured Injection Molding Surface Finish
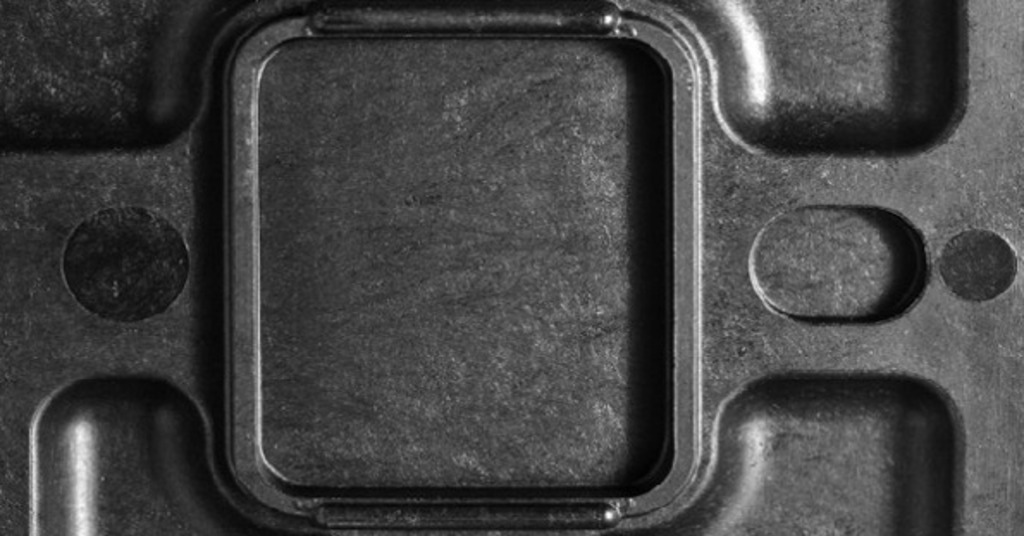
Textured Injection molding surface
Minimum roughness: 0. 80 μm
Some applications require a surface roughness or texture finish specified by the SPI. Usually, these conditions are used to increase friction for mechanical purposes. Sandblasting is optimally considered to produce the desired texture, and the sandblasting technique is used. Using compressed air, abrasive particles are directed forcefully against the part, which results in its rough surface being in line with certain application needs.
Factors Controlling Surface Finish in Injection Molding
The process of obtaining a fine texture of a plastic part starts long before molding. Several key factors influence the surface finish:
1. Tooling
The selection of the mold material significantly influences the surface quality of the injection mold. Different metals are used, but primarily hardened tool steel and aluminum are used for part fabrication. The steel molds, in particular, are prevalent for achieving the smoothest possible finishes that are perfect for parts that need to be aesthetically pleasing.
2. Right Material Selection
The material choice of injection molding finishes products. Various plastics show varying degrees of compatibility to achieve a smooth or textured surface. Moreover, fillers and pigments are also used as additives, which can affect the surface properties of the material.
3. Process Variables
The injection speed and mold temperature are the two critical process variables responsible for surface finishes in injection molding. Injection speeds at higher melt temperatures may produce glossier finishes with fewer weld lines. The fast filling of the mold cavities eliminates weld line visibility, improving the overall appearance. Adding high mold and melt temperatures to the fast injection speeds gives SPI a smoother surface finish.
4. Functional Considerations
Aesthetics are not the only reason for selecting surface finish in injection molding; functional requirements are crucial. Textured finishes can be used to make the paint adhesion better or to prevent the smooth surfaces from peeling off. Textured finishes are a type of product enhancement that gives a tactile surface that strengthens the grip. On the other hand, textured finishes also enhance part strength and safety, making them suitable for slip-resistant applications.
5. Cost Considerations
The molding is associated with high initial setup costs, which increase when higher-grade finishes like A-1 are used. The more complicated the finish, the higher the production cost. Besides, the product design is also an essential factor in the cost control. The designs are simple and can be easily reproduced, so the mass production is done using a single mold and thus, the cost is low. The manufacturing process is standardized by a single mold, reducing expenses and hastening production. On the other hand, the design variations require more than one mold, which is a reason for the high financial investment in the project.
6. VDI (STD) Surface Finish for Injection Molding
VDI 3400 surface finish, commonly known as VDI finish. It’s standard defining the mold texture set by the Verein Deutscher Ingenieure (VDI), which is the society of German engineers. The finishing is done through electrical discharge machining (EDM) during mold machining. Despite being founded by the Society of German Engineers, VDI surface finish standards are now applicable to toolmakers all over the world, including North America, Europe, and Asia regions.
Try Prolean Now!
Stages of Quality Control In Injection Molding
The quality control for injection molding in the plastic fabrication industry usually consists of four main stages. The process begins by design phase, and then goes to the mold to pre production Inspection. Alongside, process quality control, and lastly, final product inspection. After all, it goes through licensing, and certification for quality control. Let’s discuss the involved stages for maintaining the stringent quality of molding parts.
1. Design Phase
In the initial phase of quality control, known as the design review, engineers or internal and external designers come together to examine all designs for correctness before production. The 3D printing approach has many benefits when it comes to this aspect. It enables a look at the product’s appearance before the production’s actualization, which, in turn, ensures the minimization of resource expenditure on manufacturing equipment and materials. Besides this, 3D printing provides an accurate knowledge of the scale of the final production models. This configuration affects the speed of production and material usage. To illustrate, choosing materials that can form several parts simultaneously might help cut production costs and waste materials by saving on it.
2. Mold Design
In this pre-production, the mold is crafted and used in manufacturing. The mold’s material is dependent on the product type. For example, plastic molding usually uses molds made from aluminum or steel alloys, while other methods may use ceramic materials or sandstone molds, depending on the final use part.
3. Pre Production Inspection
Pre-production inspection, or “first article inspection,” visualizes parts made through the injection molding process before shipping. This vital stage enables us to verify that every part meets specifications and detect defects before the customer receives the product. Inspectors perform visual inspections of each part during the development phase and use measuring instruments to ensure the dimensions, weights, and tolerances conform to the requirements specified.
Also, functional testing is done to check the compatibility of the parts in their assembly and their suitability for the purpose for which they are intended, knowing that they may need some adjustments after the molding. Apart from visual inspection and functional tests, inspectors may apply X-ray scans or other non-destructive tests to ensure the safety and functionality of the parts.
In plastic injection molding, various types of imperfections can arise, including:
- Color and texture changes make the product look different from the others.
- Missing or misaligned holes are critical to the product’s function and appearance.
- The problem is that the dimensions of the hole, such as the size and thickness, do not match the design, which is not what was intended.
- Insufficient cavity filling leads to gaps, such as flash and short shots, which can impact product quality.
5. In Process Quality Control
The quality control process journey involves strict control of raw materials, ensuring they comply with specifications before they are integrated into the process. The focus then turns to confirmation of the right temperature and pressure settings for the injection-molding machine and other vital parts for smooth operation. This step helps avoid problems like air bubbles in the finished parts or poor surface finish products.
The following step is to screen the molten plastic for any impurities (foreign materials) that may cause disruptions during the part molding process. The next step is when the plastic is already free of particulates. It is then injected into the mold. The last stage in quality control is carefully examining molded parts for any voids or other defects, which means that each component will come out of the injection-molding machine perfectly shaped and free of imperfections.
6. Final Inspection
Each piece of the finished product is scrutinized for defects before leaving the factory. Hand inspection ensures that only the perfect ones are packaged and sent to customers. This tough procedure ensures that the products are of top quality and do not have imperfections like scratches, bubbles, or other defects. Any identified problems are corrected before packaging and shipping, maintaining customer satisfaction.
The check is carried out by professionals well-versed in identifying any deviations in parts and materials used in manufacturing. This application of stringency guarantees that only precise, flawless products are shipped by maintaining the strict standard of superiority expected by the customers.
7. Packaging
The package should be strong enough to withstand the shipping process without being damaged. It should also contain the precise instructions for safe installation or usage to avoid any problems. Whenever possible, replace non-recyclable packaging materials with recyclable ones to reduce environmental impact and increase sustainability.
Common Injection Molding Defects & Their Prevention
Injection plastic molding is not without its defects. Different types of errors can occur during the process and eventually affect the end products. Let’s briefly discuss some of the common molding defects.
Surface Delamination
Surface delamination example
In surface delamination, the surface layer flaking defect happens when thin layers on the surface of a molded component readily separate or peel away from the underlying material. As it weakens the component, it is usually considered the main problem for the finished product. The main reason for the delamination is the contamination of the resin pellets or other base material with foreign materials. If the two materials cannot bond well, flaky separation occurs. In addition to the material that goes into the hopper, any extra release agents used to separate the mold components might also be contaminated. Delamination can also be caused by the excessive moisture on the material due to insufficient drying before usage.
Burn Marks
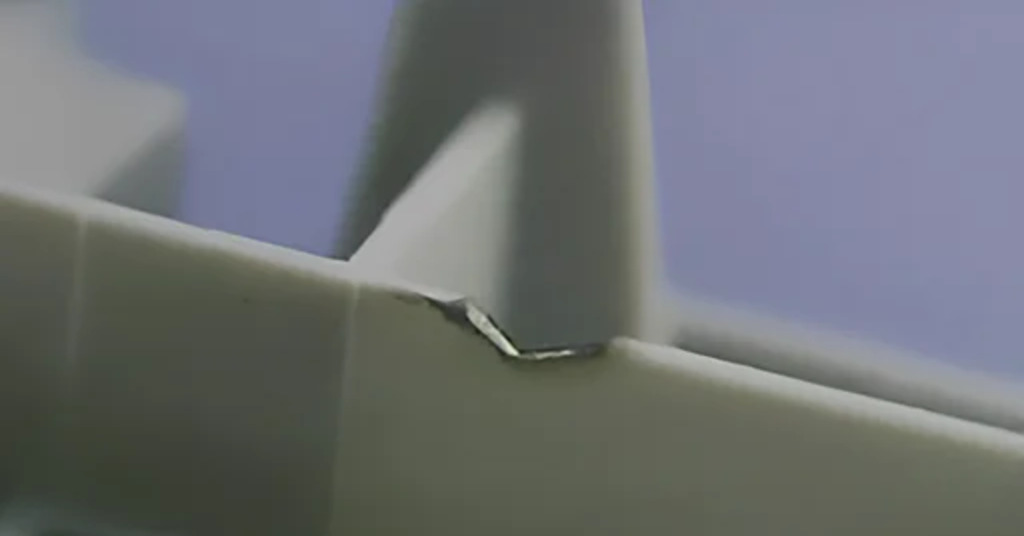
Burn mark In injection molded part
Burn marks are black or rust-colored marks that appear on the surface or edges of injection-molded parts. These flaws are often connected to the high temperature of the air bubbles or resin trapped in the mold during injection, which is caused by the high injection rates or the heating of the material to a very high degree.
Preventing burn marks requires reducing melt and mold temperatures and optimizing injection speeds. Manufacturers can also overcome this issue by using exhaust systems and enlarging the gas vents to make hot air escape easier during low-pressure injection. Moreover, reducing the molding cycle time helps avoid trapping air or overheating resin.
Vacuum Voids
Vacuum voids are a frequent problem in the molding process and usually occur due to a lack of plastic material in the mold. Generally, they’re caused by a short shot, when the injection process does not inject enough plastic to fully shape the part. As the plastic cools, it contracts, thus creating empty spaces in the molded product.
Besides, vacuum voids can be caused by the gas pockets that are formed inside the plastic material during the process. These pockets may form due to the following reasons;
- The lack of venting causes the air to be trapped in the mold instead of displaced by the plastic.
- The water vaporizes inside the plastic resin, which creates pockets as it escapes.
- When heated during molding, the volatile compounds in the resins’ mixture can vaporize into gas.
- The injection of the plastic resin can result in overheating, which in turn can cause the degradation of the plastic resin and the introduction of gas into the material.
All these factors cause vacuum voids, which in turn affect the quality of the molded product.
Discoloration
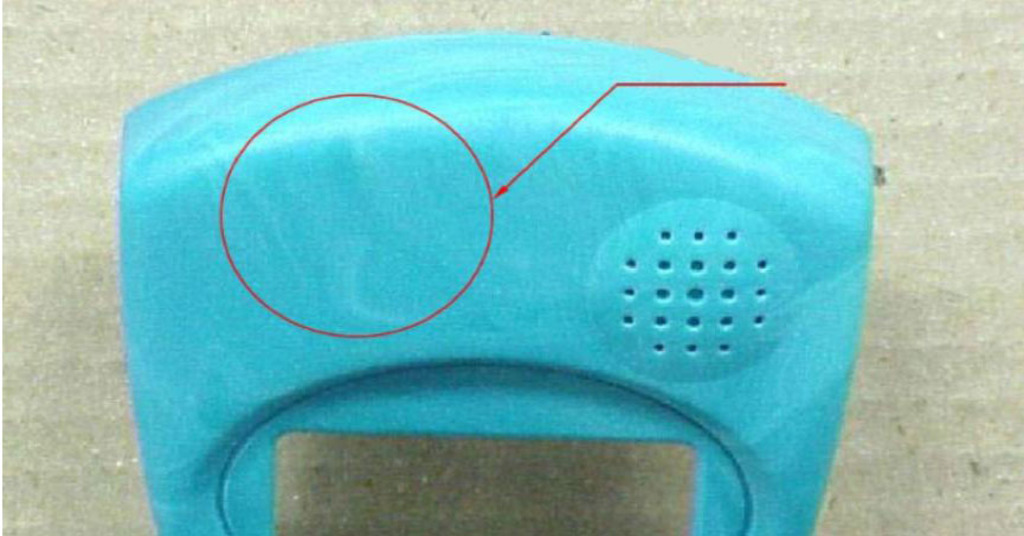
Surface discoloration
Discoloration, or “color streaking,” is when a molded object shows an unexpected color variation. However this defect usually affects only streaks of abnormal color. It can ruin the product’s visual appeal, even though it does not affect its structural integrity. The usual causes of discoloration are residual resin in the nozzle, aged pellets in the hopper, or leftovers from a previous production run. Besides, the other factors that may lead to the failure of the product are the low heat conductivity of the coloring component or the wrong mixing of the masterbatch.
To avoid discoloration, manufacturers must ensure that the machine, hopper, nozzle, and mold are thoroughly cleaned between manufacturing cycles to remove any leftover materials. Besides, choosing color agents with high heat conductivity is a must to survive the molding process. The proper mixing of the masterbatch is also essential to assure the same color output in all stages of production.
Warping
Warping is when various parts of a molded object contract unequally during the cooling process, just like how wood can warp when it dries unevenly. Thus, the object becomes twisted, uneven, and curved. The most significant reason for warping is the early or instant cooling. High temperature or the low thermal conductivity of the material can also be the cause of warpage. Besides, mold design is also a factor, especially when the shrinkage is more with the thickness of the wall.
Warping is a slow and long cooling process that will enable the material to cool evenly or. The choice of material is also important since some materials are less susceptible to shrinking during cooling than others. To illustrate, particle-filled thermoplastics are more resistant to warping than semi-crystalline materials or unfilled grades. The mold redesign to make sure that the wall thickness and the symmetry are consistent can also be the factor that will make the component more stable during the cooling process, thus, the risk of warping will be reduced.
Sink Marks
The sink marks are like little dents or craters on the flat surface of a part, usually found in the thicker regions where the material shrinks and pulls the surface inward. Usually, the cooling time is not enough because the mechanism of cooling is not effective, which is the reason for these defects. Besides, the weak mold cavity pressure or the high temperature at the gate can cause sink marks, especially in the thick parts where the cooling is slow.
To avoid sink marks, a lot of steps can be taken. The cooling time can be increased by reducing the shrinkage, and the thickness of thicker sections can be shortened by reducing the cooling times. By lowering the mold temperatures, increasing the holding pressure, and extending the holding duration, the cooling and curing processes become more efficient, thus decreasing the chances of sink marks.
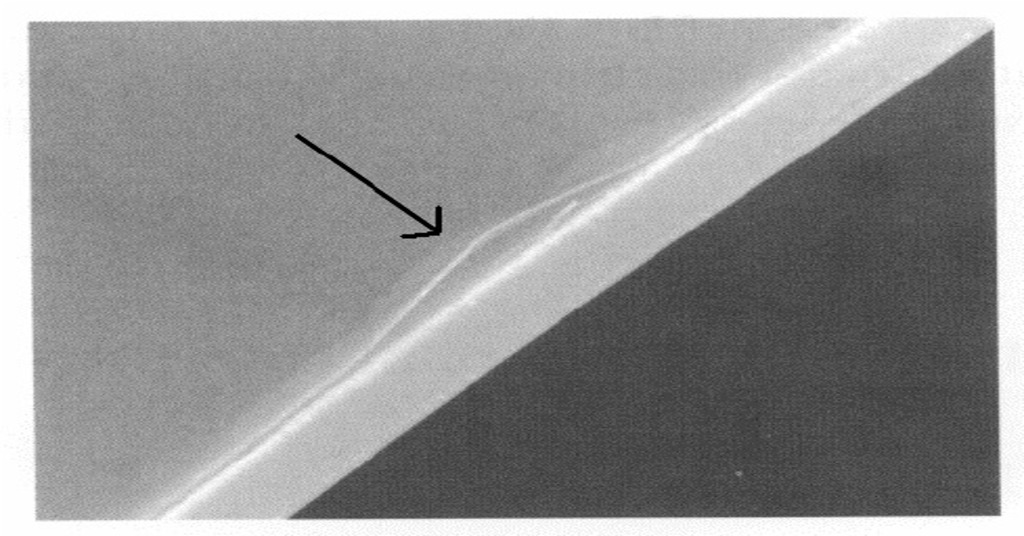
Jetting
The jetting looks like a surface defect on injection molded parts, looks like serpentine or squiggly lines, just like worm tracks. This problem happens when resin is injected too quickly into the mold through a small area like a gate or runner. The resin goes into the mold cavity with a spraying motion, creating a snake-like stream that cools before the rest of the melt fills the mold, causing the material to not fuse enough and the formation of jetting.
Underlying causes of jetting may include:
- The resin flow dynamics within the mold is a fascinating phenomenon that can be easily explained by a human perspective.
- The speed of the resin injection is a key factor that needs to be taken into consideration while designing the resin injection molding process.
- The temperature of the resin must be just right to make the perfect piece.
Troubleshooting should be centered on the gate placement and the diameter adjustment so that the injection is not directly into the center of the mold cavity. Besides, you can also check and change the ram speed settings, use hot runners or heated molds to avoid premature cooling, and try other resin options that are better in terms of their characteristics and performance, especially the mold temperature and the cooling rate.
Explore Custom Injection Molding Solutions at Prolean Platform
We provide on-demand custom manufacturing solutions from a broad spectrum. Prolean’s china injection molding facility helps for fabricating a few 100s prototype parts development to 1000s large batch parts’ manufacturing. Our In-house machining platform is equipped with robotic molding machines to bring your parts cost-effectively. Proleans’ staff of engineers helps you make an analysis of your DFM, and ensures permanence to your customized and personalized project requirements. Contact us now, and get an instant free instant online engineering quote!
Try Prolean Now!
Summing Up
The choice of the correct surface finish for your plastic part in injection molding is not only a matter of aesthetics but also of numerous advantages. Nevertheless, making this decision early in the design phase is of utmost importance as it is the foundation of tooling, material selection, and other significant factors.
Working with a plastic injection molding expert is crucial to mastering this process. Prolean’s experts can provide personalized advice and help you make well-informed decisions. Let us be your expert advisors for best in-class injection molding service for your intended part fabrication projects.
FAQs
Q1. What is custom injection molding?
Custom injection molding is the production process of plastic parts or components that are customized to the needs of the customer. It is a process of using a mold to inject molten plastic material into a particular shape, thus making it possible to produce complex and precise parts with the customizable features such as size, shape, color and material properties.
Q2. What are the benefits of using surface finishing in the injection molding process?
Surface finishes improve the aesthetics, functionality, and durability of the final product, making it more attractive, textured, and durable.
Q3. Why is polishing, and lapping considered as the best choices for finishing?
Lapping and polishing are precision techniques used to achieve a flat and smooth surface finish by carefully removing a thin layer of material from the surface. In injection molding, this is usually done using abrasive pads and diamond compounds. The procedure involves moving the part in circular motions over the abrasive pad, which reduces the roughness and the surface finish.
Q4. What is chemical etching?
Chemical etching is the process of creating unique textures on mold surfaces through chemical reaction which is suitable for the precise mold processing. The procedure is the process of preparing the mold surface, applying the resistant inks to form a pattern, and etching away the exposed areas with a strong acid, which leaves the desired texture.
0 Comments