
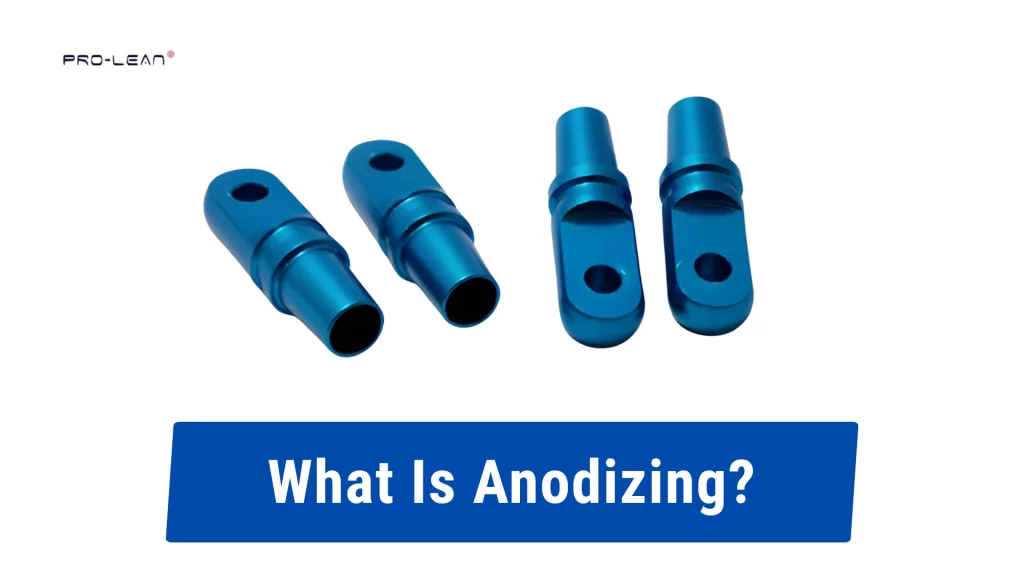
Identical blue anodized parts
Anodizing builds an oxide layer on metal parts. Machined parts like plates, housings, and brackets often face handling, moisture, and light wear. Bare aluminum scratches easily and starts to oxidize. Anodizing controls the surface and stabilizes it. But what is anodizing?
It’s a process that runs in an acid bath with an electric current. The part serves as the anode, and the oxide layer forms on the base metal. It is not a separate coating, so it does not chip or peel during use.
Shops control thickness based on function. Around 10 to 25 microns works for general parts. Hard anodizing can reach 40 to 60 microns on wear surfaces such as sliding plates or fixture contact areas.
After the process, the surface stays slightly porous. This allows dyeing if color is required. Sealing closes the pores and improves corrosion resistance.
In this article, you will learn what is anodizing? How aluminum anodizing works step by step. It explains types of anodizing, where each one fits, and how shops control the process. It also covers common issues, limits, and how to select the right option for your parts.
What is Anodizing? (Definition and Fundamentals)
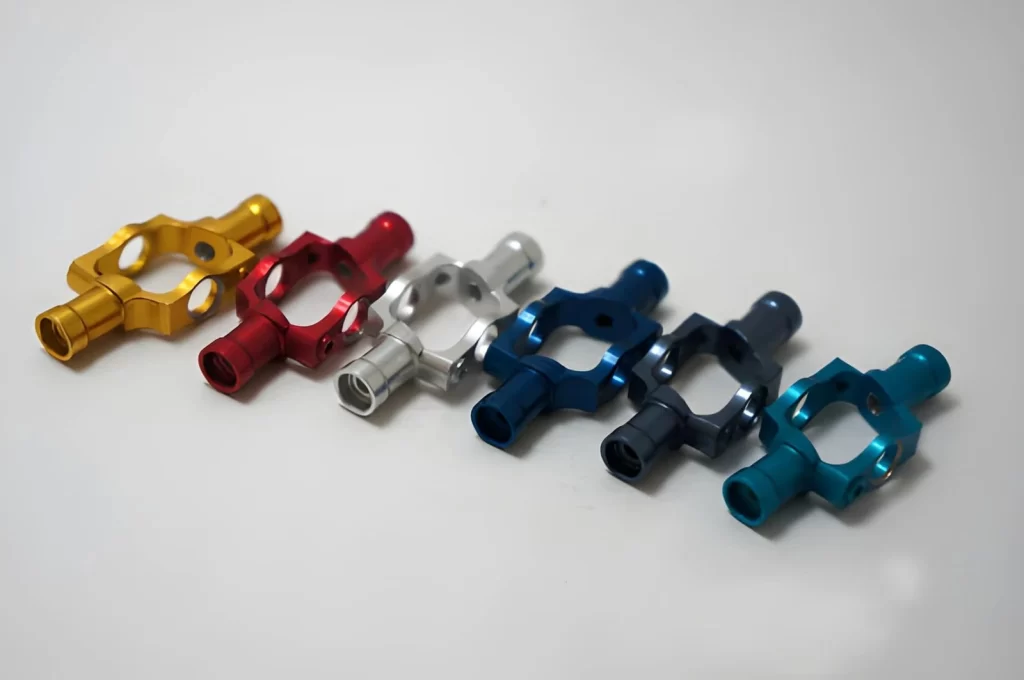
Anodized aluminum parts
Anodizing is one of several processes (finishings) applied to the surfaces of machined metal components. At Prolean Tech, we primarily apply anodizing to aluminum parts machined on our CNC machine.
If comparing, alodine vs anodize, anodizing produces a thin, non-detachable oxide coating. In other words, the oxide layer produced by the anodizing process is formed from the aluminum itself, and it remains attached to the metal throughout its life. However, machining lines may remain visible on the surface after anodizing.
At our facility, the part is first placed in a tank containing chemicals, then connected to electrical power. As soon as electricity begins flowing through the system, the aluminum surface reacts, forming an oxide layer. The thickness of the oxide layer varies according to settings established before the anodizing process begins.
Because aluminum responds readily to anodizing, it is typically used to produce housings, brackets, and plates. While titanium and magnesium can also be anodized, these materials are relatively rare in everyday machining operations.
The thickness of anodic layers will vary depending on the component’s intended application. Most commonly used protective coatings range from 10 to 20 microns and provide both sufficient protection and acceptable cosmetic appeal. Components that require additional wear protection, such as sliding or friction applications, are usually coated with thicker (hard) anodic layers greater than 40 microns.
A final consideration when working with anodizing is that, while it protects against corrosion, it does not address surface preparation issues. Therefore, before completing surface preparation (anodizing), machining problems, including excessive machining marks or scratches, will be highlighted on the surface.
Try Prolean Now!
How Does Anodizing Work?
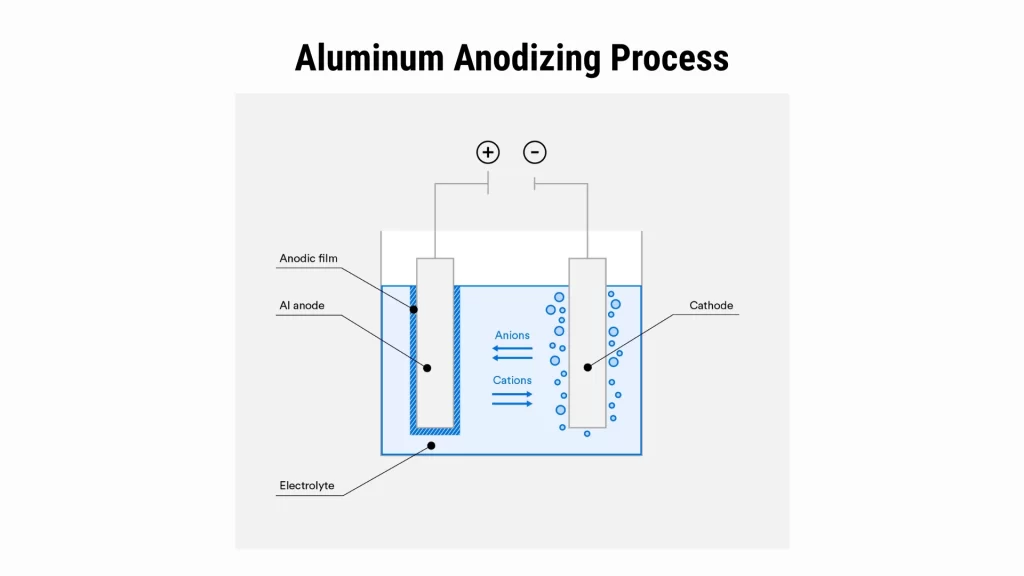
Aluminum anodizing process
Anodic coating is developed primarily for aluminum metal. Electrochemically, it produces a controlled oxide layer by converting the outer layer of aluminum.
To create that layer, you need to control three factors: how much electricity passes (amperage), the type of chemical solution (electrolyte) you’re working in, and how long the object is left submerged.
Surface Cleaning and Preparation
The processes start with cleaning. Before anodizing, parts are cleaned. All oils, coolants, and machine cutting fluids have to be removed; any other contaminants could cause the coating to be non-uniform.
Parts may be lightly etched after cleaning. Eching removes a very thin layer of surface material, ensuring that all parts are uniformly coated.
At this point, the part’s surface finish is important because anodizing does not fill machining marks. Instead, the anodized coating will follow the part’s texture.
Fixturing and Electrical Setup
The clean parts are mounted on conductive racks. These racks provide a continuous path of electrically conductive material for each part as it is processed.
Each rack has a terminal strip along its back that contacts the positive terminal. Each part will make direct contact with this terminal. A cathode plate(s) will be suspended inside the tank and make contact with the negative terminal. Good electrical contact is necessary. Without good electrical contact, the part will either receive an uneven coating or “burn” where poor contact occurs.
Electrolyte Bath Conditions
The tank is filled with an acidic solution. The most common solution used for standard anodic coatings is sulfuric acid. The tank temperature can be controlled. Typically, it is kept between 68 and 72°F (18 and 22°C).
Consistent tank conditions are needed to allow even layer formation. Tank agitation helps evenly distribute ions throughout the tank, preventing variations in coating thickness.
Current Application and Oxide Formation
When voltage is applied to the terminals, current begins to flow through the circuit. Oxygen ions from the electrolyte begin forming aluminum oxide directly at the aluminum surface. As the oxide forms, it builds outward from the base metal. Some of the base metal is converted to oxide. Therefore, consideration should always be given when forming tight-tolerance parts to account for dimensional changes due to conversion. At the same time, controlled dissolution of the oxide results in micro-pores in the entire layer.
Coating Growth and Thickness Control
The thickness of anodic coatings is dependent upon several variables:
- Current Density
- Time in the tank
- Temperature of the tank
Typical ranges:
- Decorative coatings: 10 – 15 µm
- General industrial coatings: 20 – 25 µm
- Wear-resistant coatings (hard anodize): 40 – 60 µm
Increasing the current density and lengthening the processing time will produce thicker coatings, but requires closer control to prevent edge burning.
Post-Anodizing
After anodization, each part’s surface will remain porous. If a color is desired, a dye can be introduced into these pores. Otherwise, the final product will be a natural gray or matted aluminum color.
Sealing Process
Sealing closes off those pores within the oxide layer. Sealing can be performed by dipping the part in boiling water or chemically using a variety of products available on the market. Once sealed, corrosion resistance increases, and the surface’s stability for extended periods is assured.
Which Chemicals Are Used in the Anodizing Process?
The majority of anodizing uses an acidic electrolytic bath. While the actual chemistry of anodic oxidation can vary depending on the specific anodizing type, many industrial anodizing operations use a combination of standard electrolytes and additives to control both the thickness of the formed coating and its surface characteristics.
Primary Electrolyte Solution (Acid Bath)
Sulfuric Acid is typically the first choice among all types of anodic oxidation (Type I, Type II, and Type III). It has proven to be the best choice for controlling uniform oxide formation on aluminum. As a result, it is by far the most commonly employed acid in CNC anodic oxidation production.
Chromic Acid has been used in a limited number of situations involving very thin coatings (typically in aerospace applications, where minimum dimensional change is desired).
Bath Additives For Process Control
Depending on how each operation controls its anodizing bath, various additives may be introduced into the solution to support process control. These include:
- Organic Acids to provide added surface stability
- Aluminum Salts to regulate dissolution rates;
- Buffer Agents to stabilize the bath pH
All these additives can often go unnoticed by the operator. However, they represent essential components of maintaining the bath.
Rinsing and Neutrization Solutions
Following anodizing, the parts will undergo cleaning with deionized hot water or mild alkaline rinses to neutralize any remaining surface acidity before sealing.
Sealants
During the last step of processing, sealing occurs either through one of two methods:
- Hot deionized water (the most widely used sealant).
- Nickel acetate sealants (used for enhancing corrosion protection).
What are the Primary Types of Anodizing?
Anodizing can be one of several processes, depending on the type of acid used, the thickness of the layers applied, and the service requirements. Shops that machine parts decide which type of anodizing to use based on anticipated wear, potential exposure to corrosive environments, and their ability to maintain fit tolerances.
Industrial anodizing methods are as follows:
Type I – Chromic Acid Anodizing
Chromic acid anodizing generates a relatively thin oxide layer. The resulting coating remains relatively thin with typical coating thicknesses ranging from 0.5 to 2.5 microns.
Type I is primarily used when minimal dimensional change is required. Brackets used in aerospace applications and weldments are good examples of Type I usage.
There is no high level of decoration associated with chromic acid-anodized coatings. Chromic acid anodizing produces a dull gray finish. Although aesthetically unappealing, it offers primary benefits as a corrosion-resistant barrier and a stable surface for painting and adhesives.
Because chromic acid anodizing produces a thinner layer than sulfuric acid anodizing, it can be used on parts with more complex geometries without causing significant stresses in the part’s thinner cross-sections.
Type II – Sulfuric Acid Anodizing
Sulfuric acid anodizing is the standard production method for producing anodic coatings. Virtually all CNC-machined aluminum parts undergo some form of sulfuric acid anodizing. Coating thickness varies from approximately 5 to 25 microns. Factors affecting coating thickness are time, current density, and alloy grade.
After the anodization process, the resulting coating has pores throughout. Dyeing into these pores creates colored finishes, including black anodized aluminum. When sealed, the resulting coating is corrosion-resistant for general-purpose applications.
Parts such as housings, covers, panels, and electronic enclosures utilize Type II anodizing because they require both aesthetic appeal and acceptable levels of wear resistance.
For production purposes, Type II anodizing is economical, readily available, and compatible with virtually all commonly used aluminum alloys for machining operations.
Type III – Hard Anodizing (Hardcoat)
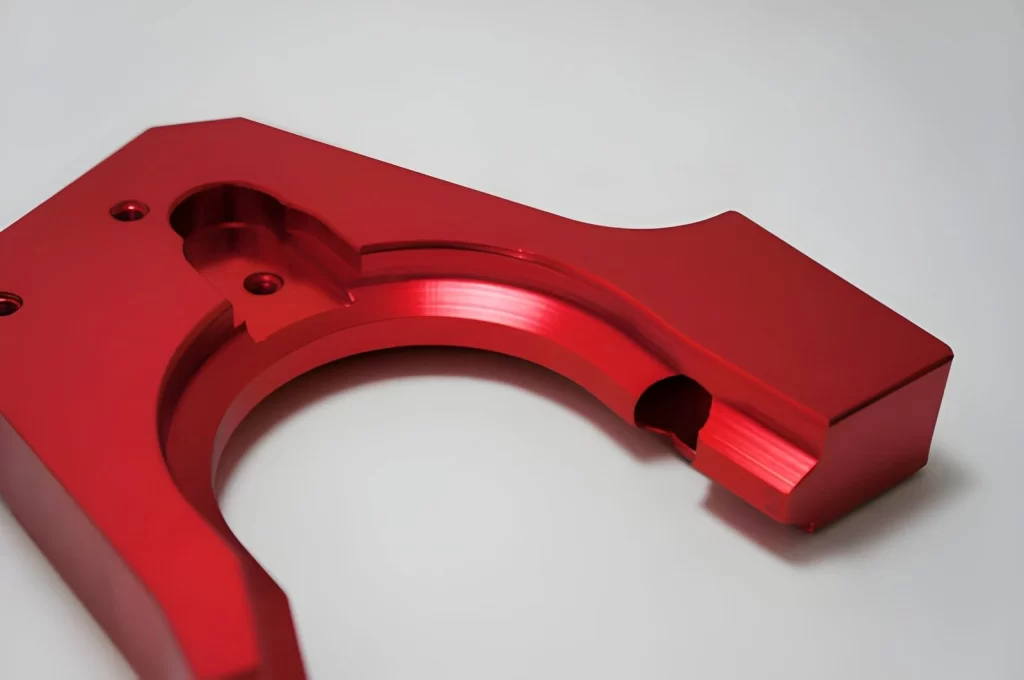
Red-colored anodized aluminum part
Hard coat anodizing uses the same sulfuric acid chemistry as Type II anodizing, but is produced under stricter controls. As a result, the coating is formed at lower temperatures and higher current densities.
Under increased processing conditions, thicker coatings are produced. Typical coating thicknesses range from 12 to 50 microns.
Due to the coating’s denser nature, it becomes harder than the substrate material. Therefore, it is suitable for components subjected to sliding wear and/or impact loads.
Components such as hydraulic piston rods, valve body components, gear components, and sliding components utilize Type III anodizing. These parts experience cyclic loading and sliding motion.
Although hard-coated surfaces improve wear characteristics, they also increase the component’s dimensions. Consequently, designers must account for this additional size during assembly and fitment.
Quick Comparison Snapshot
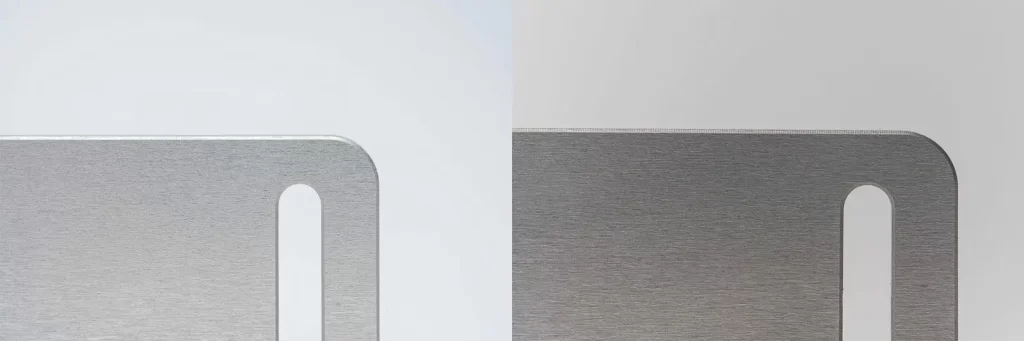
Type II vs Type III anodized finish
Table 01: Aluminum Anodizing Types
| Type | Electrolyte | Thickness (µm) | Surface Character | Main Use | Behavior |
| Type I | Chromic acid | 0.5 – 2.5 | Thin, dull grey | Aerospace, bonding parts | Least effect on fit, used when geometry must stay unchanged after machining |
| Type II | Sulfuric acid | 5 – 25 | Porous, can be dyed | General CNC parts | Slight growth on dimensions, usually acceptable in normal clearance fits |
| Type III | Sulfuric acid (controlled) | 12 – 50 | Dense, hard surface | Wear and sliding parts | Needs allowance in design due to measurable build-up on functional surfaces |
Try Prolean Now!
What to Check Before Anodizing Machined Parts
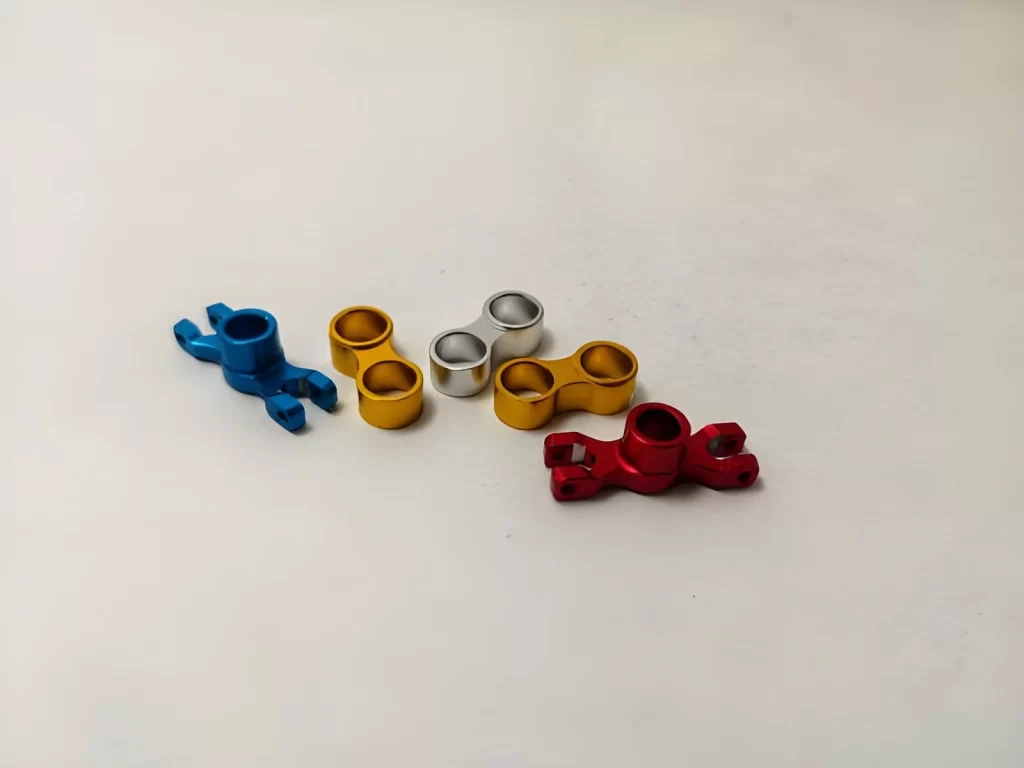
CNC turned parts – anodized aluminum
Anodizing alters how surfaces interact with their environment. To avoid potential problems at the finishing stage, several checks must be completed before the job goes out for finishing.
Most of the time, when parts don’t fit together right, it’s because designers and/or machinists overlooked the importance of checking a couple of important items during design/machining.
Material Selection
For CNC work, aluminum is the primary material being anodized. Aluminum reacts very consistently during anodizing and produces consistently good coatings.
Other metals, such as titanium or magnesium, can also be anodized; however, due to variable reaction characteristics, they produce inconsistent results from batch to batch. For practical purposes, using multiple materials in a single assembly should be avoided if anodizing is planned.
Racking and Contact Marks
Unlike free-floating parts in tanks, parts are mounted on racks (to carry electrical current) when anodizing. All mounting/contact points will remain uncoated.
All mounts/contact points will always create a small mark on the finished surface. On a general basis, this type of marking is applied to non-visual areas such as:
- Mounting edges
- Hidden faces
- Non-functioning surfaces
If you do not plan to coat this area, markings may appear where they are not wanted.
Size Change from Coating Growth
When anodizing occurs, it is not just a matter of applying a layer to the part’s surface. The anodic layer forms within the material and creates growth both inwardly and outwardly.
The typical “rule” followed by many shops regarding anodizing is that approximately half of the thickness of the anodic layer grows into the material, while the remaining portion grows outward.
For example, if the overall thickness of the anodic layer is 20 microns (µm), then each dimension (all sides) increases by approximately 10 microns (µm). Therefore, the effects of the anodic layer development can cause issues concerning:
- Shaft & hole fits
- Thread engagement
- Seals/seal areas
Clearances need to be increased before machining to accommodate parts requiring close tolerances.
Surface Finish After Anodizing
The anodic process does not remove previous machining marks. Rather than correcting them, it simply duplicates the pre-anodic surface condition. Most of the time, the desired finish condition is established before parts are anodized. Standard CNC finishes typically range from 1.6 µm Ra to 3.2 µm Ra, depending on the intended function.
Coverage in Deep or Complex Areas
All areas will not receive equal coverage. Due to the limited flow of electrolyte through deep recesses, blind holes, and narrow corner areas, the color may be lighter or unevenly distributed. Such is the nature of anodizing and can be anticipated in design planning.
Is Anodizing a Chemical Process?
Anodization is a two-step process: chemical and electrical. The core point is that it is a self-contained chemical process and relies on no external coatings. Instead, it alters the metal’s surface chemistry by applying heat (in the form of electricity) and chemicals in an electrolytic bath.
The actual anodized part is placed in an acidic solution and connected to direct current (DC). As soon as electrons flow through the circuit, the oxygen in the solution will react chemically with the anodized aluminum surface. Once aluminum reacts with oxygen, aluminum oxide forms, which is directly created from the base metal.
Therefore, this is different from a simple paint or plating coating. Instead of simply applying a new layer to existing metal, anodizing creates a brand-new layer of aluminum oxide directly from the original metal through a chemical reaction and an electrically assisted chemical reaction.
From a machining perspective, anodic oxidation is a dual process called electrochemistry, as both electrical energy and a chemical reaction occur simultaneously to form the finished layer.
Read more:Anodized vs. Powder Coat: Which Is the Best for Your Parts?
Difference Between Anodizing and Electroplating
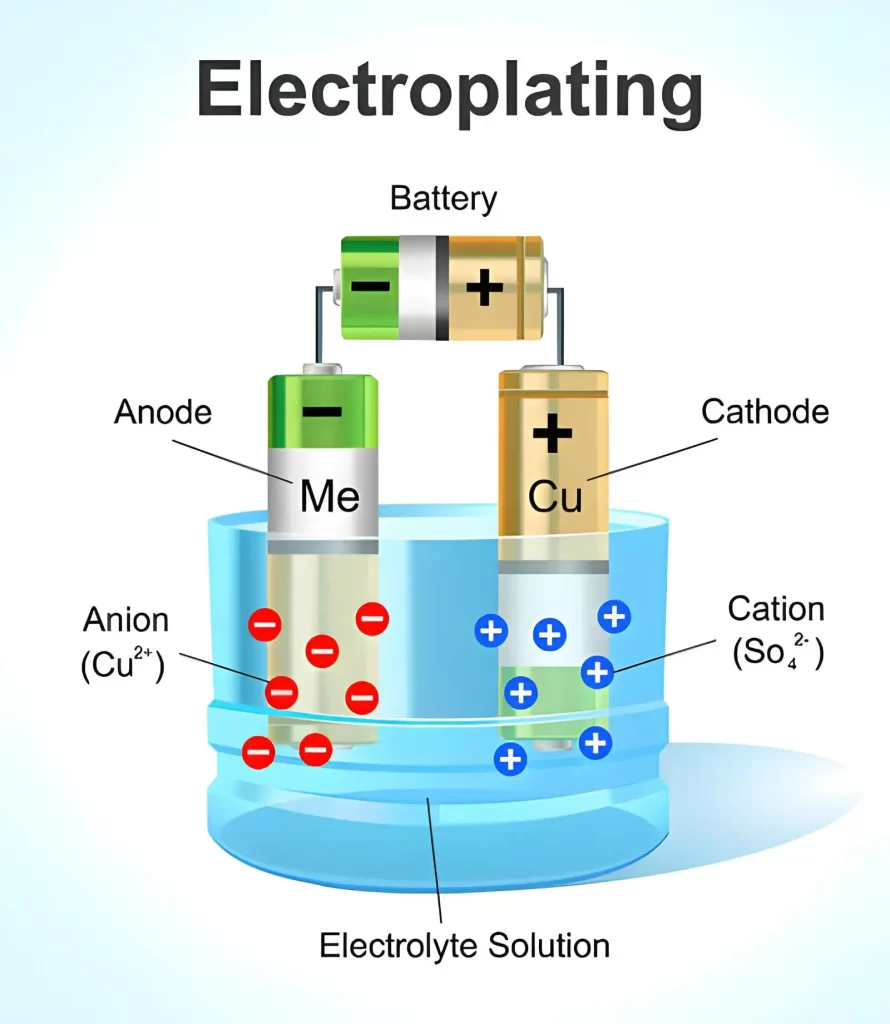
Electroplating process – Illustration
Anodizing and electroplating are similar in that they both use a DC electric current in an electrolyte bath. However, the chemical reaction at the surface is entirely different.
From a machining perspective, anodizing alters the surface of the base material, whereas electroplating adds a metal layer.
What Happens to the Base Metal?
Anodizing changes the aluminum base material by forming aluminum oxide where the original metal was located. The anodic coating forms on the base material. Electroplating does nothing to change the base material. Instead, a new metal layer is deposited onto the base material.
Electrical Role of the Part
The anodic process connects the part as the anode (positive terminal), allowing for oxidation reactions to occur on its surface.
In the cathodic process, the part is connected as the cathode (negative terminal), causing metal ions to migrate toward it and be deposited. The polarity inversion will result in a complete transformation of the coating type produced.
Coating Formation Method
| Aspect | Anodizing | Electroplating |
| Layer source | Base aluminum reacts | External metal ions deposit |
| Growth direction | Inward + outward | Only outward |
| Bond type | Integral with substrate | Deposited layer on the surface |
The conversion of the surface by anodizing produces a new surface layer. A new, separate layer is produced by electroplating on top of the original surface.
Dimensional Change Behavior
When dimensional changes occur during anodizing, the surface will increase in thickness on both sides of the part. It has been observed that approximately 50% of the anodic growth occurs within the part. Only the outer surface of the part increases in thickness during plating. Each micron added to the part during plating increases the fit tolerance; therefore, parts manufactured using a CNC technique with tight tolerances may experience significant issues.
Coating Thickness Control
Typical thickness ranges for anodic coatings are 5 to 25 μm (Type II) and 0 to 50 μm (hard anodizing).
Ranges for electroplated coatings are typically 1 to 20 μm, depending on the metal used (e.g., nickel, chrome, gold). The thickness of anodic coatings is primarily determined by the time of operation at a specific current density.
On the other hand, the thickness of electroplated coatings is generally determined by the duration of the plating process and the plating efficiency.
Surface Function in Service
Hard oxide films exist within the anodized layer. These films provide a high level of wear protection and also provide some corrosion protection.
However, these films are electrically insulating. Depending on what type of anodizing metal was deposited onto the substrate, different properties will exist within the electroplated layer:
- Nickel: wear and corrosion resistance
- Chrome: hard decorative surface
- Gold: conductivity and corrosion stability
Therefore, both the deposition process and the material deposited onto the substrate contribute to how well each layer performs in service.
Defect Behavior on Machined Parts
All tool marks present on surfaces before anodizing will remain visible even after anodizing. The appearance of defects caused by previous milling operations may be partially improved during plating, as the plating process provides smoothing effects.
However, if very deep tool marks were present on the surface before plating, they will still be evident once the thinner coating is applied.
What Are the Anodizing Colors?
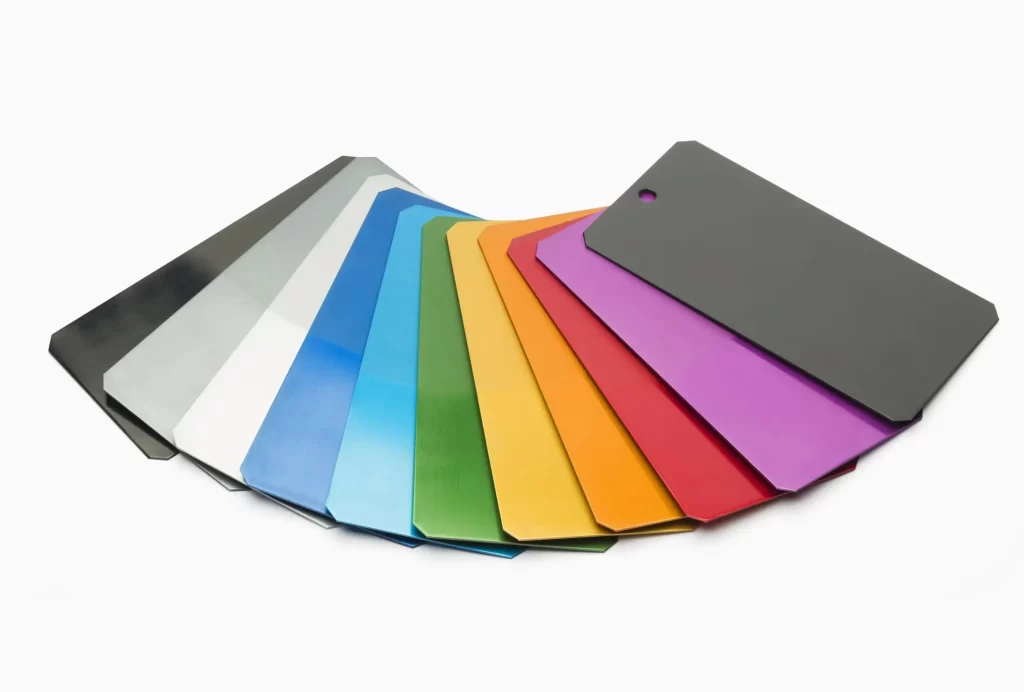
Customized colored aluminum anodizing
Anodized aluminum can be colored after the oxide layer is formed. The surface stays porous after anodizing, so it absorbs dye before sealing.
In production, color choice depends on dye stability, cost, and the part’s intended use. Some colors are used more often because they are easier to control in batch production.
Common Anodizing Color Options
- Black
- Blue
- Red
- Green
- Yellow
- Orange
- Purple
Try Prolean Now!
Benefits and Limitations of Anodizing Metal
Anodizing is used in CNC (Computer Numerical Control) to extend the lifespan of machined aluminum surfaces by forming a thin anodic oxide layer on the surface.
When selecting processes that add value to the product and do not require changes to the part’s core design, anodizing can be one such option. As such, anodizing may be best suited for applications that require a higher level of corrosion protection and a consistent finish after machining.
Benefits of Anodizing
Corrosion Protection
Because the anodic coating develops directly on aluminum, it provides a barrier against direct moisture and coolant contact. As a result, many parts have been shown to withstand storage, handling, and even limited outdoor exposure in manufacturing and shop environments.
Surface Wear Resistance
As compared to raw aluminum, the anodic coating is much harder. The wear on surfaces caused by tooling, fixtures, and handling will decrease. Applications include brackets, covers, and mounts; these types of components retain their appearance over time in assembly environments.
Better Surface for Finish Options
With anodization, the surface becomes uniform; therefore, dyes attach to it uniformly. Raw aluminum often has varying degrees of color acceptance; black and clear colors are generally the most uniform finishes available in production and vary less from batch to batch.
Limitations of Anodizing
Color Variation in Production
Color is not consistent across batches. The color of an alloy may vary depending on the specific surface treatment (surface finish) and the conditions of the electrochemical cell (bath). Some colors tend to show greater variation than others. For example, bright colors such as red and yellow will show greater variation than duller colors such as black and/or natural finishes.
Scratch Exposure After Processing
The anodization layer is very thin. Once the top layer is scratched, the aluminum beneath it is exposed. Due to the nature of these scratches, they cannot be blended with other paint coatings or repaired locally; therefore, if there is scratch damage, you typically need to either rework the part or accept it.
No Fix for Machining Errors
The anodizing process follows the original surface. Therefore, it will not correct defects created during the machining process. This includes but is not limited to: rough machining surfaces, tool marks, or defective dimensions.
Materials That Can Be Anodized
Anodizing is mainly used for aluminum in CNC and production work. Other metals can also be anodized, but they behave differently in the process and are used in more specific applications.
Common Anodized Materials
- Aluminum
- Aluminum alloys
- Brass anodizing
- Titanium anodizing
- Magnesium
- Zinc
- Copper
- Manganese
- Anodized steel
How to Assess the Quality of Anodized Parts
In most cases, quality control of anodized components (parts) is accomplished through a combination of visual inspection and dimension measurement. In a typical manufacturing environment, the objective of the first few steps of quality assurance is to verify that the anodic coating is uniformly applied; that all mating components fit together correctly; and that no processing anomalies occurred during anodization.
Surface Appearance
The initial inspection of the surface should be conducted under standard lighting. A uniform appearance throughout the component is desired.
When dyes have been added to the anodizing bath, color uniformity is also desirable. Areas where anodizing was incomplete due to excessive current density or improper racking would typically exhibit as darker or lighter areas on flat faces and/or edges.
Contact and Burn Marks
Examine the portion(s) of the component in contact with racks during processing. While these portions of the part will never develop complete anodic coatings, they should be limited in size and number.
If burn damage or irregularities exist in the area adjacent to any contact point, it generally indicates either a poor electrical connection or excessive localized current density during anodizing.
Coating Coverage
Check for continuity of the anodic coating along the edges of the part, in recessed areas, and within any pocket-type areas. Breaks in the coating indicate inadequate electrolyte flow into these areas or improper positioning of the part in the electrochemical cell.
Dimensional Check
After anodizing, measure the critical dimensions for function. Since the anodic film thickness has increased slightly, all close fits, such as shafts, holes, etc., are inspected after anodizing to ensure proper clearances remain.
Surface Feel and Integrity
Both hard- and soft-anodically coated components should have a relatively smooth surface when lightly touched. Under normal use conditions, both types of coatings should not scratch easily. Any flaking or chipping of the coating indicates contamination before the electroplating operation or poor process control.
Is Anodizing Expensive?
Generally, anodizing is the lowest-cost finishing operation available to you in your CNC shop for aluminum parts. It is typically less expensive than many other coatings, such as electroplated coatings, because no large amounts of material are added during the anodizing process, and it requires minimal post-process operations.
Your overall cost may vary depending on the size of the part being finished, the total number of pieces to be processed at once (i.e., a small batch vs. a very large order), the required surface finish quality, and the specific type of anodize desired. While
Type II (Sulfuric Acid) anodize is the least expensive and most commonly used; hard anodize (Type III) has additional expenses due to its need for better temperature control, higher currents, and longer processing times.
Contact Prolean Tech for Aluminum Anodizing Services
At Prolean Tech, we provide anodizing services for CNC-machined aluminum parts, with controlled surface finishes and stable batch quality. Before finishing, we review the part geometry, surface condition, and masking areas to ensure proper coating coverage and fit after anodizing.
We support both functional and cosmetic anodizing, including clear and colored finishes. Common color options include black, blue, red, and other standard industrial shades, selected based on part use and consistency requirements.
- Type II anodizing for general protection and colored finishes
- Type III hard anodizing for wear and sliding contact parts
- Clear and dyed color options with controlled batch matching
- Surface and tolerance review before anodizing starts
- Batch production support with consistent finish control
Send your drawings or parts to Prolean Tech for anodizing review. We check feasibility, color options, and dimensional impact before processing starts.

0 Comments