
? Where is your part right now?
SURFACE FINISHING
Brushing Service
Abrasive brushes are drawn across the surface in one direction, so the finish is a set of fine parallel lines rather than a mirror or a matte. The lines are the finish - they hide fingerprints and light handling scratches, and they are why brushed metal reads as deliberate rather than unfinished.
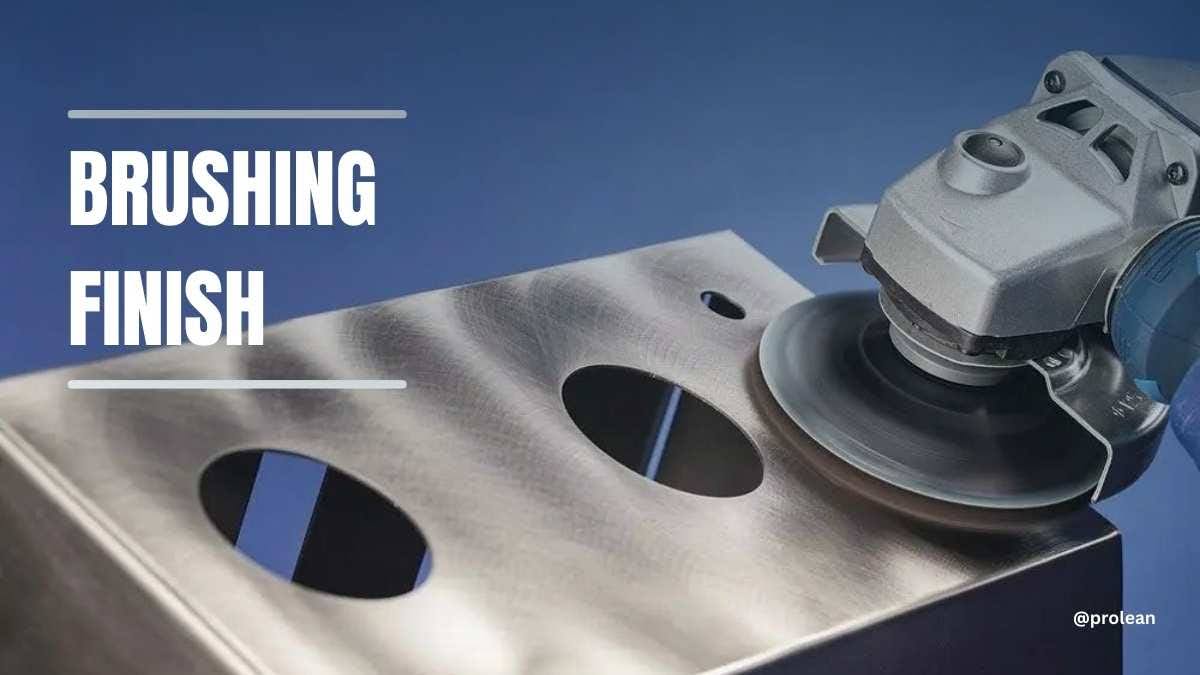
Where it fits
Brushing is a mechanical finish, and it is normally the last step
No chemistry, no coating and almost no material removed. It sits after machining and after deburring, and because it changes how the part looks it usually goes on last.
Brushing follows the surface it is given: tool marks that are deeper than the brush cut will still read through the new finish. Burrs are not brushed away either - they are removed in step 2. If a face has a visible callout, state it on the drawing - see drawing notes.


Fit check
Can we brush your part? Three things decide it
Material, how the part is handled afterwards, and which direction the lines should run. The last one is specified far less often than it should be.
Material
- Covered - ABS, aluminium, brass, stainless steel and steel, as published for this process
- Aluminium and its alloys are the most common substrate for a brushed finish
- Highly corrosive service is not advised for this finish - the published note says so
For corrosive service, look at the alternatives in the material table.
Line direction
- The finish is directional, so the drawing should say which way the lines run
- On a cylinder it is normally circumferential or axial - they look very different
- On a panel, the grain is usually set to run with the longest edge
If the direction is not stated, the shop picks one - state it and it stops being a variable.
What happens after
- Brushed faces show handling marks - a wiped fingerprint can change the sheen locally
- Adhesive labels and film can leave a local change in the grain
- If the part will be anodized or coated afterwards, say so: the prep changes
Tell us the next operation so the surface we hand over suits it.
Specifications
Brushing: satin texture, Ra 1.2 to 47 um published, 5 materials
Every value below is what we publish for this process, copied from our own specification. Where the shop has not confirmed a figure, the line says To confirm.
What it removes
Brushing takes almost nothing off - it is a finish, not a correction
A brush cuts a very shallow pattern into the top of the surface. That is why it cannot rescue a part that is out of tolerance, and why it does not need masking the way blasting does.
| Where it acts | What changes | Why it matters | What to do |
|---|---|---|---|
| The visible face | A shallow, directional pattern is cut in | The pattern is what makes the finish read as brushed rather than unfinished. | State which faces are cosmetic - we do not brush faces you have not called out. |
| Sharp edges | Edges are dressed rather than blunted | Brushing is far gentler on an edge than blasting or tumbling. | If an edge has to stay dead sharp, say so; otherwise it comes back lightly dressed. |
| Tool marks | Fine marks are blended into the grain | A mark deeper than the brush cut remains visible in the finished surface. | Do not specify brushing as a fix for deep damage - remove it before brushing. |
| Dimensions | Effectively unchanged | Unlike plating or cladding, no layer is added and no measurable stock is removed. | No allowance is needed on the drawing for a brushed finish. |
| Corrosion behaviour | Surface is worked, not protected | The published note advises against this finish on highly corrosive parts. | For corrosive service, pair it with a protective finish or choose another process. |
The band inside the published Ra 1.2 to 47 um range that suits a given application is being confirmed with the shop. The rules above hold regardless of the final figure.
Tell us which faces are cosmetic and which way the lines should run, and we will quote the brushing with the machining as one operation.
Get a quoteLine direction
Straight line, circular or cross hatch - brushing is chosen by its pattern
The same process produces visibly different surfaces depending on how the brush is moved across the part. These are the three patterns we are asked for.
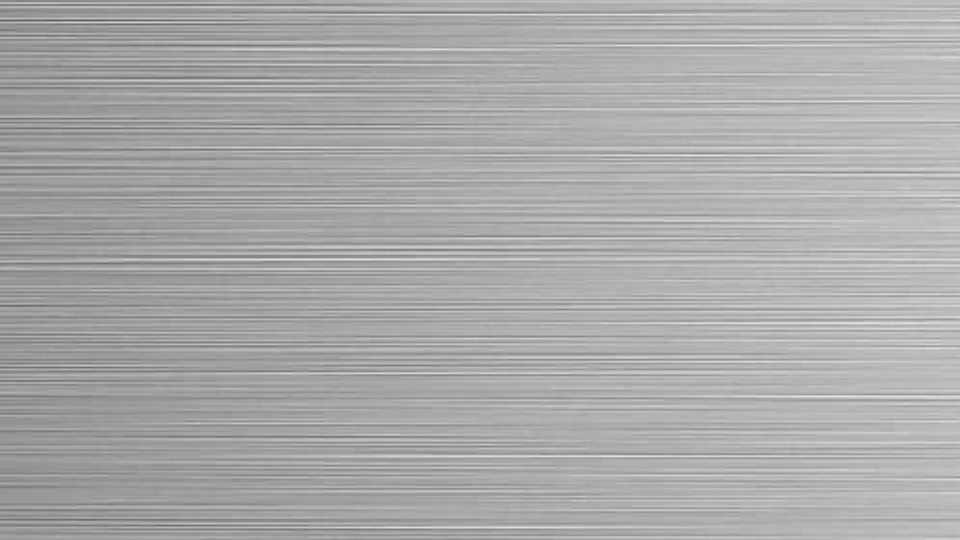
Straight line grain
The classic brushed metal look: a single grain direction running across the face. Uniform across the part, with the lines staying parallel from edge to edge.
Best for: flat panels, enclosures, signage, decorative plate
Not for: faces that will be viewed from every angle - the grain disappears and reads as uneven.
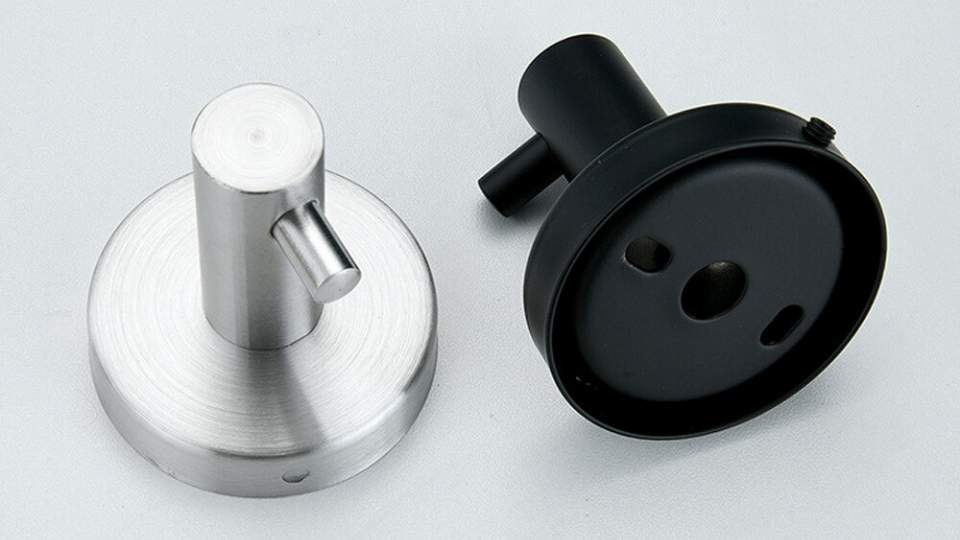
Circular brushing
The brush is worked in a circular pattern, which produces a radial finish with no single direction. Used where the part is turned rather than flat, or where a directional grain would look wrong.
Best for: round parts, turned faces, parts viewed from all sides
Not for: flat panels where the classic straight grain is expected.
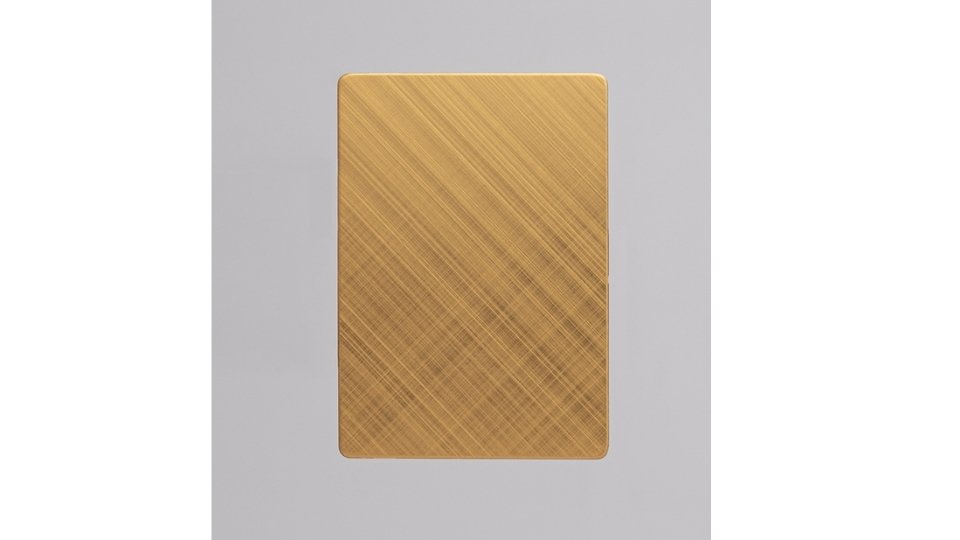
Cross hatch
A second pass is run across the first, giving a woven appearance. It breaks up reflections more than a single direction does, and it is less prone to reading as one-sided.
Best for: large faces, hiding handling marks, breaking up reflections
Not for: fine detail areas where two passes would soften the geometry.
Tell us which face is seen and from where, and we will tell you which grain direction will look right.
Get a quotePick or avoid
When brushing is the right call - and when it is not
Pick brushing when
- You want a directional satin finish - the deliberate grain is the point.
- Fingerprints and light handling scratches need to disappear into the surface.
- The part is aluminium, stainless steel, brass, steel or ABS.
- You need a finish that shows no added layer: dimension and weight stay as machined.
- The face is large and flat, or round - both take the grain well.
Avoid brushing when
- You need a mirror or reflective surface - brushing is the opposite. See polishing.
- You want a uniform matte with no direction. That is bead blasting.
- The part will be used in highly corrosive service - the published note advises against brushing there. See passivation or anodizing.
- The surface has deep damage that brushing would only partly blend.
- The face is highly detailed - a fine pattern would soften the detail.
Brushed and anodized is a common pairing on aluminium. Send one drawing and ask for both operations quoted together.
Get a quoteDesign constraints
What decides whether the brushed part comes back right
Three variables: the starting surface, the grain direction, and how the part is handled between brushing and packing.
Starting surface
Brushing blends fine tool marks into the grain; it does not remove deep scratches, gouges or weld repairs. Fix those before brushing, not with brushing.
Grain direction
The finish is directional. On a cylinder the grain can run around or along the axis, and the two look nothing alike. State which one the drawing expects.
Edge treatment
Brushing dresses edges lightly. If a chamfer or an edge has to stay crisp for assembly, call it out - otherwise it comes back slightly softened.
Handling and packing
A brushed face marks easily. Parts are usually film masked or bagged after brushing, because a wipe with a dirty cloth shows up as a local change in sheen.
Faces not to brush
Locating diameters, press fits and sealing faces should not be brushed. List them, or they may be treated as cosmetic surfaces.
What comes next
If the part is anodized or coated afterwards, the next operation affects how the surface has to leave us. Tell us the sequence, not only the finish.
Drawing notes
What to write on the drawing so the grain goes the way you meant
Two lines do most of the work: which faces are cosmetic, and which direction the lines run. Without them the shop decides both.
1. BRUSH THE FOLLOWING FACES ONLY: ____________________________________________ (SEE VIEW A)2. GRAIN DIRECTION: PARALLEL TO DATUM ___ / CIRCUMFERENTIAL / AXIAL (DELETE AS APPLICABLE)3. FINISH: UNIFORM SATIN, NON-REFLECTIVE. RA ______ WITHIN THE PUBLISHED RANGE FOR THIS PROCESS.4. DO NOT BRUSH: LOCATING DIAMETERS, PRESS FITS, SEALING FACES (LIST ANY FACE THAT MUST STAY AS MACHINED)5. KEEP EDGES SHARP AT: __________________6. AFTER BRUSHING: MASK OR BAG BEFORE PACKING. NO ADHESIVE LABELS ON BRUSHED FACES.
Examples only. The grain direction line is the one most often missing - and the one that decides whether the part looks like the sample you approved.
Materials
Which materials we brush - the published list of five
The five below are what our published specification for this process covers. Anything outside it needs a sample before we can quote.
| Material | Brushing | Notes | Use instead |
|---|---|---|---|
| Aluminium and its alloys | Yes | The most common substrate for a brushed finish, and the usual pairing is anodizing afterwards. | — |
| Stainless steel | Yes | A brushed stainless face hides fingerprints far better than a polished one. | — |
| Brass | Yes | Takes an even directional grain; often left unlacquered so it patinates. | — |
| Steel | Yes | Named on the published list - normally paired with a protective finish. | Passivation |
| ABS | Yes | A plastic on the published list. Pressure and brush type have to be chosen for it. | — |
| Highly corrosive service | Not advised | Our published note: brushing is not advised for highly corrosive parts. | Anodizing |
| Other materials | Send a sample | Soft plastics and very thin sections behave differently under a brush. | As machined |
Material not on the list? Send a sample and we will run a test brush before quoting the batch.
Get a quoteApplications
Where brushing is used
Brushed finishes turn up wherever a metal surface has to look deliberate without being reflective - which is most places a customer sees the part.

Signage and architectural panels
A brushed face reads evenly at distance and does not flare under directional lighting, which is why it is common on signage and interior metalwork.

Appliance and equipment fronts
The grain hides fingerprints and light scratches - the everyday handling that a polished front would show immediately.

Hand tools and hardware
Brushing removes the sharp brightness of a machined finish and leaves a working surface that does not show every touch.
QA and documentation
What you get back with the parts
Purchasing usually needs paper as well as parts. Here is what we can state today and what is still being confirmed.
Visual uniformity
Brushed faces are checked for an even, non-reflective grain across the specified area.
Direction check
The grain is verified against the direction stated on the drawing.
Roughness measurement
Measured Ra per material inside the published 1.2 to 47 um range is being confirmed.
Grain consistency between batches
Whether a roughness/gloss record can be issued to hold repeat batches to the same look is being confirmed.
Further reading
Brushed finishes, satin and grain direction
Longer answers on the questions this page only has room to state.
What brushing does, what it cannot fix, and how the finish is specified.
The grain directions in detail, and how brushed aluminium behaves under anodizing.
The non-directional matte counterpart - pick this when the lines are not wanted.
The other end of the scale: a reflective surface rather than a satin one.
The full list of finishes we run, with what each one is for.
Compare all 20 finishes by roughness, thickness, corrosion and cost.
FAQ
Brushing FAQ: the questions engineers ask us
What is a brushed finish?
What roughness does brushing give?
Will brushing remove scratches or tool marks?
Which direction should the grain run?
Can you brush aluminium and then anodize it?
Which materials can be brushed?
Is brushing suitable for corrosive environments?
Does brushing change the part dimensions?
How do I get a brushing quote?
Get your brushing quote
Upload a STEP, IGES or PDF drawing. Tell us which faces are cosmetic, which direction the grain should run, and whether the part is anodized or coated afterwards.
What to send us
- Drawing - 2D and 3D files (STEP, IGES or PDF).
- Material - one of the five published materials, or send a sample if it is not.
- Cosmetic faces - which surfaces the customer will actually see.
- Grain direction - straight, circumferential, axial or cross hatch.
- Target roughness - your Ra inside the published 1.2 to 47 um range.
- Next operation - anodizing, coating or assembly, so the prep matches it.
All uploads are secure and confidential. Engineers review and reply with a quotation and lead time.