Injection molding is an accurate process, but sometimes small deviations may be observed. Tolerances are variation limits of a product within the specified limit of size or measurements. It helps parts work as intended especially when executing a project that involves multiple use of components. Lack of critical tolerance means, the parts will not fit and are unable to perform as expected. There are usually two key tolerances in injection molding: machining and resin. The accuracy limit for machining is +/-0.003 in. (0.076mm) and is typically related to the mold tool. Resin tolerance is applied to the finished part. Normally, it’s not less than +/-0.002 inches per inch (0.051mm per mm).
Now, let’s talk about design, material, and process characteristics to be considered to achieve the required plastic injection molding tolerances and, make parts work perfectly.
What Factors Affect Injection Molding Tolerances?
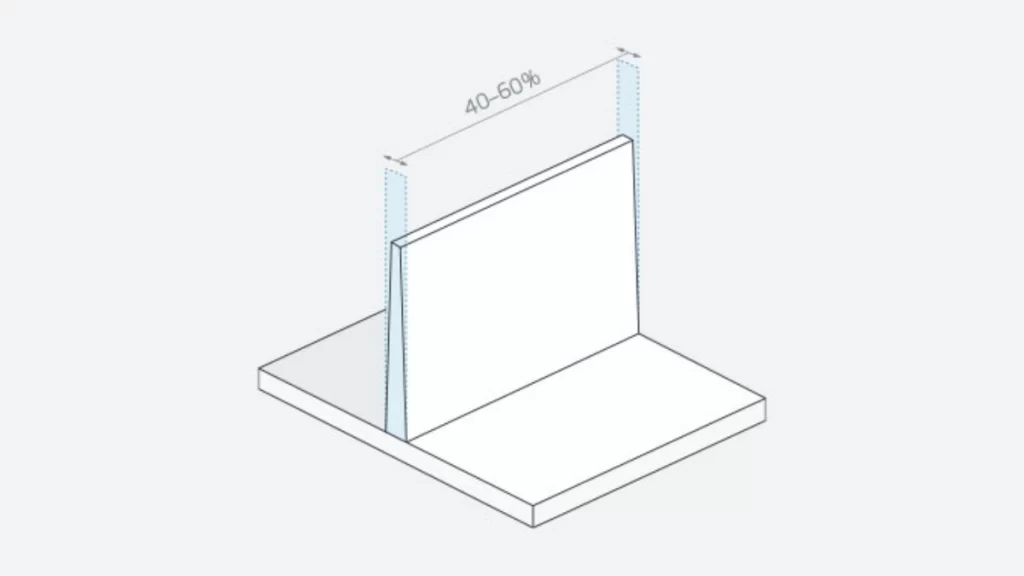
Injection molding tolerances
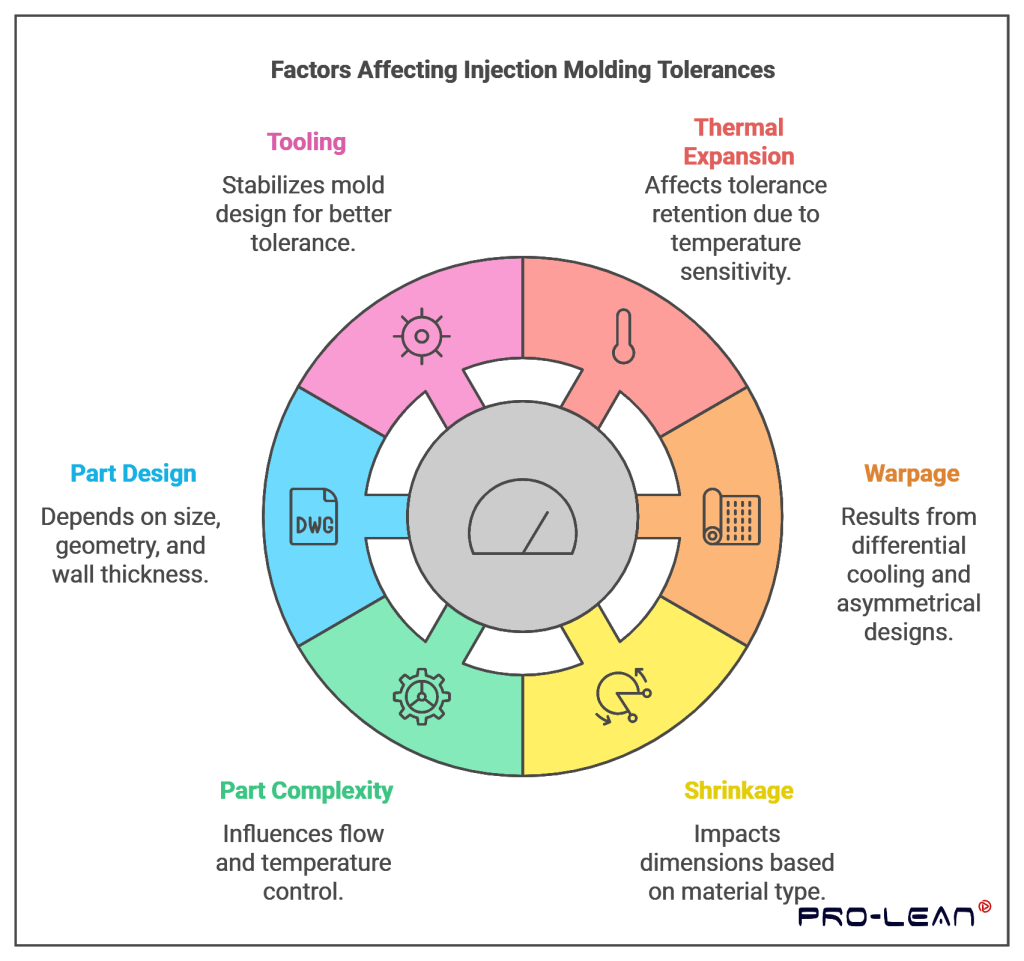
Many factors affect the injection molding tolerances to a greater extent. Perceiving these factors helps in adjusting the tolerances for project conditions.
Thermal Expansion
The thermal expansion coefficient holds significant importance in the plastics. Temperature sensitivity is another serious characteristic of plastics because they expand and shrink with temperature changes. Thermal expansion is not directly seen to affect the holding features. So, tolerance retention can be rather problematic if temperature fluctuation occurs greatly.
Warpage
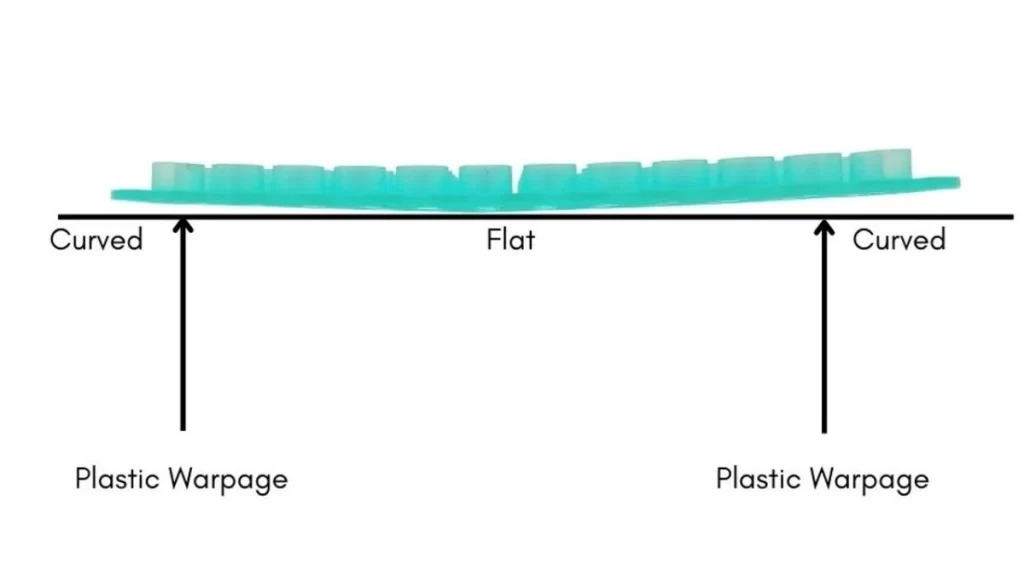
Warpage- injection molding defect
Warpage is defined as the deviation from the original flatness of a material as a result of differential cooling. When the designs of the turbine blades are asymmetrically thick-walled, the cooling time is quite long, and there is a chance of warpage. Moreover, the non-uniform cooling creates issues like the inability to hold close tolerance. It’s essential to minimize warpage issues. This can be achieved by maximizing injection molding, but not to an extreme level.
Shrinkage
All tested plastic materials shrunk to some extent upon cooling. The impact can be seen in the general dimensions of the end-user part. The shrinkage phenomenon affects all plastic materials at different rates. The amorphous materials are known to shrink more than the crystalline materials, in general. Because the phase change is brought about by melting. Most industries employ plastic parts due to the product flexibility. Since they are economically sustainable, many manufacturing firms prefer them.
Part Complexity
Challenging aspects are involved in material flow tooling and design. They can slow down a fast filling rate which can take place during the molding process. Hence the level of temperature control is of great significance. The cooling system makes it easier to achieve the tolerance levels that are required.
Part Design
Tolerances highly depend on part size, geometry, and wall thickness. The bigger and thicker parts shrink at different rates. The ability to manage such variations is of great importance for high-quality outcomes. The part geometry provides control means that there can be better tolerance.
Tooling
Tolerances can only be determined with the help of the injection mold design. The stability of the mold plays a role in the control of the cooling rate and reduction in the contraction process. Therefore, mold design improves tolerance reliability and product quality.
Try Prolean Now!
How Material Affects Molding Tolerances?
It’s important to identify the right resin for the job to succeed. In processing, all the materials have different properties and require different techniques to be followed. They fuse, crystallize, and solidify at different temperatures. Selecting the right material helps obtain the desired specifications.
Shrinkage
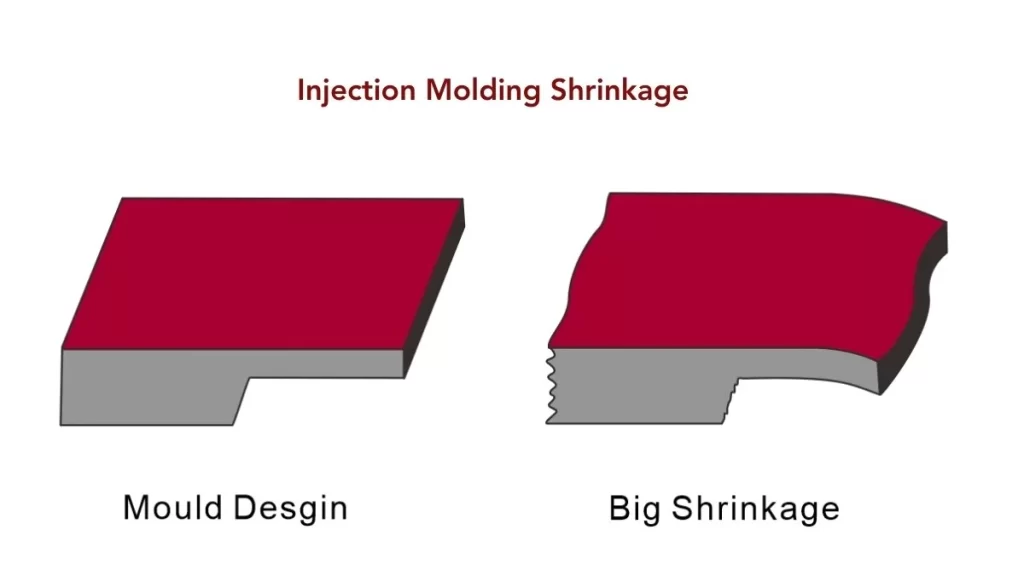
Shrinkage In molding
When cooling molds all materials shrink. Shrink rate is an important characteristic that should be taken into account. Knowing the way the mold copes with shrinkage is crucial. For example, if a mold is used to produce ABS plastic, the shrink rate is 0.003 in./in (0.076 mm/mm). It would be advisable to design the mold to factor in this shrinkage. This approach helps to make sure the final part achieves the required tolerances.
However, if you switch from poly to polypropylene, the shrink rate differs. Polypropylene has a shrinkage rate of 0.018 inch per inch (0.457mm per mm). This leads to a variation of 0.015 in./in. (0.381 mm/mm) between the two cases. It may become as small as 0.015 in., which can produce serious problems in the part. (Learn more about Compression Molding Vs. Injection Molding).
Part Shrinkage and Tolerances Estimation
The injection molded parts are known to shrink as the material cools. The shrinkage factor directly affects the tolerance of parts. Ameliorating such changes is crucial and pervades a good part of the design. To estimate shrinkage, one has to measure the linear shrinkage rate of a material. Standard such as ASTM D955 helps in this testing process. First, use a sample injection and allow it to cool. Calculate the shrinkage using the following equation:
Shrinkage Rate = 100 % (Lc – Lp) / Lp
Where:
- Lc: Cavity Length
- Lp: Part Length After Cooling
The above equation determines the linear shrinkage for the materials whose properties are not symmetrical. Relevantly, long fiber-filled resins have low shrinkage during the melt flow. This can lead to overestimation of the shrinkage in the transverse direction. (Learn more about CNC Machining Vs. Injection Molding)
Mold Flow Analysis
The expansion rate is determined effectively when a mold flow analysis is conducted. This simulation demonstrates the process through which plastic resin is packed into a mold. It also shows areas in the mold that can be hard to fill. Generally, simulation utilizes Autodesk Moldflow, one of the most commest employed CAE tools.
Typical Shrinkage Values of Plastics
The following table shows the shrinkage range for most of the injection molding resins available in the market. In general, consult the material’s datasheet for the best outcomes.
| Material | Shrinkage Range |
| ABS | 0.7–1.6 |
| PC/ABS | 0.5–0.7 |
| Acetal/POM (Delrin®) | 1.8–2.5 |
| ASA | 0.4–0.7 |
| HDPE | 1.5–4 |
| HIPS | 0.2–0.8 |
| LDPE | 2–4 |
| Nylon 6/6 | 0.7–3 |
| Nylon 6/6 Glass Filled (30%) | 0.5–0.5 |
| PBT | 0.5–2.2 |
| PBT Glass Filled (30%) | 0.2–1 |
| PEEK | 1.2–1.5 |
| PEEK Glass Filled (30%) | 0.4–0.8 |
| PEI (Ultem®) | 0.7–0.8 |
| PET | 0.2–3 |
| PMMA (Acrylic) | 0.2–0.8 |
| PC | 0.7–1 |
| PC Glass Filled (20–40%) | 0.1–0.5 |
| Polyethylene Glass Filled (30%) | 0.2–0.6 |
| Polypropylene Homopolymer | 1–3 |
| Polypropylene Copolymer | 2–3 |
| PPA | 1.5–2.2 |
| PPO | 0.5–0.7 |
| PPS | 0.6–1.4 |
| PPSU | 0.7–0.7 |
| Rigid PVC | 0.1–0.6 |
| SAN (AS) | 0.3–0.7 |
| TOP | 0.5–2.5 |
| TPU | 0.4–1.4 |
How to Optimize Injection Molding Tolerances
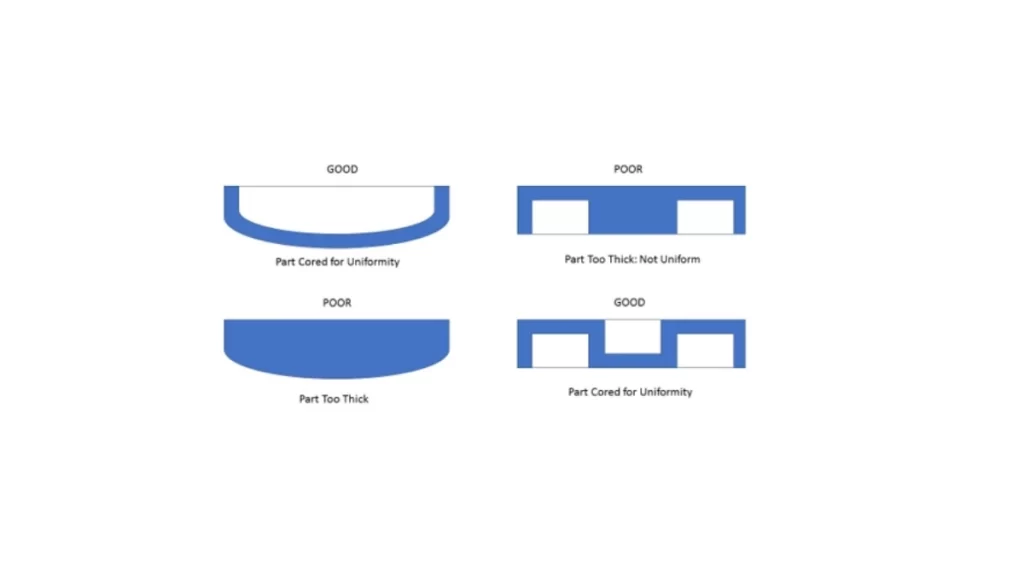
Tolerances optimization criteria
Specifically, it’s important to predict typical injection molding tolerances in advance. They include product design, selection of material, tooling, and process control.
Design Phase
Always follow the Design for Manufacturing (DFM) guidelines. This approach greatly reduces the possibility of warping, shrinking, and misalignment. Strategies in DFM should enhance the manufacturing process and the tolerances quality of the product.
Overall Size
Tolerances are highly dependent on the product’s total size. Warping is one of the biggest risks for distortion on larger items. Size considerations during design are sensitive.
Wall Thickness
Equal wall thickness is ideal in terms of shrink rate stabilization. It minimizes problems such as warping and sinking. Designs should avoid massive thick walls and internal corners better be as rounded as possible.
Draft Angles
It’s possible to reduce part removal from molds by incorporating draft angles. This practice minimizes the probability of shrinkage and sticking. Normally the draft angle should range from 10 to 20 degrees.
Bosses
Designers should not make the thickness of the boss walls too much. Thick walls may lead to the formation of voids and also can cause an increase in the cycle time.
Select the Right Material
Selecting the right material influences the injection molding tolerances significantly. Materials should also have similar shrinkage values. Deciding on the right resins for size and design is also crucial.
Keep Mold Tools in Mind
The mold structure has a great impact on accuracy and is usually affected by mold tool structure. Oversizing is a best practice to minimize the problem of material shrinkage. In this case, the temperature should be uniform throughout the molding process. Reducing defects means proper positioning of ejector pins and gates.
Perform RPCs
The main reason why calibrating variables affect part quality is that it has a persistent and steady effect. Temperature, pressure, and holding time are the core factors that must be regulated. The use of sensors makes it possible to have feedback while performing the process.
Try Prolean Now!
Standard Injection Molding Tolerances
The table below aims to give a systematic summary of the Standard Injection Molding Tolerances according to GB/T 14486-2008. It’s intended to assist injection molding companies in comprehending the tolerance limits in part dimensions to produce a quality end product.
- Tolerance Level (MT1 – MT7): These levels show the accuracy degree needed for a part. MT1 is the most accurate while MT7 has more tolerance.
- Dimension Range (mm): Every row refers to a particular size category of molded parts – from miniatures (0-3 mm) to greater measurements (120-140 mm).
- Columns “a” and “b”: Each tolerance level is subdivided into “a” and “b” columns, giving two tolerance values for each level. So depending on the application, the appropriate tolerance value for the specific application can be selected.
|
Tolerance Level |
Dimension Range (mm) |
0 – 3 |
3 – 6 |
6 – 10 |
10 – 18 |
18 – 30 |
30 – 50 |
50-80 |
80-120 |
120-140 |
|
MT1 |
a |
±0.050 |
±0.050 |
±0.050 |
±0.060 |
±0.075 |
±0.100 |
±0.120 |
±0.150 |
±0.180 |
|
b |
±0.025 |
±0.025 |
±0.030 |
±0.035 |
±0.040 |
±0.050 |
±0.060 |
±0.070 |
±0.080 |
|
|
MT2 |
a |
±0.070 |
±0.070 |
±0.080 |
±0.100 |
±0.120 |
±0.150 |
±0.180 |
±0.200 |
±0.230 |
|
b |
±0.035 |
±0.040 |
±0.050 |
±0.060 |
±0.075 |
±0.090 |
±0.110 |
±0.130 |
±0.150 |
|
|
MT3 |
a |
±0.090 |
±0.100 |
±0.120 |
±0.150 |
±0.180 |
±0.200 |
±0.230 |
±0.270 |
±0.300 |
|
b |
±0.050 |
±0.060 |
±0.075 |
±0.090 |
±0.110 |
±0.130 |
±0.150 |
±0.180 |
±0.200 |
|
|
MT4 |
a |
±0.120 |
±0.140 |
±0.160 |
±0.200 |
±0.240 |
±0.270 |
±0.300 |
±0.350 |
±0.400 |
|
b |
±0.060 |
±0.080 |
±0.100 |
±0.120 |
±0.150 |
±0.180 |
±0.200 |
±0.240 |
±0.270 |
|
|
MT5 |
a |
±0.160 |
±0.190 |
±0.220 |
±0.270 |
±0.320 |
±0.350 |
±0.400 |
±0.460 |
±0.500 |
|
b |
±0.080 |
±0.100 |
±0.130 |
±0.160 |
±0.200 |
±0.230 |
±0.270 |
±0.300 |
±0.350 |
|
|
MT6 |
a |
±0.220 |
±0.240 |
±0.270 |
±0.350 |
±0.400 |
±0.460 |
±0.500 |
±0.600 |
±0.700 |
|
b |
±0.100 |
±0.130 |
±0.160 |
±0.200 |
±0.240 |
±0.270 |
±0.350 |
±0.400 |
±0.460 |
|
|
MT7 |
a |
±0.270 |
±0.300 |
±0.350 |
±0.460 |
±0.500 |
±0.600 |
±0.700 |
±0.800 |
±0.900 |
|
b |
±0.130 |
±0.160 |
±0.200 |
±0.240 |
±0.300 |
±0.350 |
±0.400 |
±0.460 |
±0.500 |
Measurement and Inspection Techniques for Injection Molding Tolerances
Actual control and measuring tools are used in verifying injection molding tolerances with the following methods used; Key methods include:
- Visual Inspection: A basic inspection entails the identification of part irregularities like warping, sinking, and cracking.
- Manual Measurement: The direct measurement of parts using measuring instruments such as calipers and micrometers. This method is suitable for simple parts with a small number of critical dimensions.
- Automated Measurement: For parts with many critical dimensions. The use of CMMs and Vision Systems in the production of these complex parts.
- First Article Inspection (FAI): The final inspection procedure evaluates the first part as it comes off the production line in a production run. It offers all the dimensional parameters and makes a comparison of every parameter to the design values, regarding the tolerance of the products. (Read more about Injection Molding Quality Control)
Conclusion
Injection molding tolerances are critical in guaranteeing the quality and effectiveness of the molded parts as well as their fitness for use. These tolerances are affected by issues such as shrinkage, warpage, thermal expansion, part design, complexity, and tooling design. Through work, design, and material, as well as the control of the processing conditions of injection molding, it is possible to achieve the required tolerances for any project.
Get Started Your Project With Prolean Tech!
Many injection molded parts require specific dimensions to meet the function they are designed to serve. Tolerances mean that the components will fit, function as required, and meet the required specifications.
Working with Prolean Tech is a big step towards manufacturing high-quality parts for different applications. Having been in the industry for well over a decade now, Prolean has gained experience in precision mold manufacturing and injection molding. We focus on developing medical-type products meeting high quality and regulatory requirements for such products using significant experience and expertise. Contact us now for quality injection molding service and get a no-obligatory quote from our experts!


0 Comments