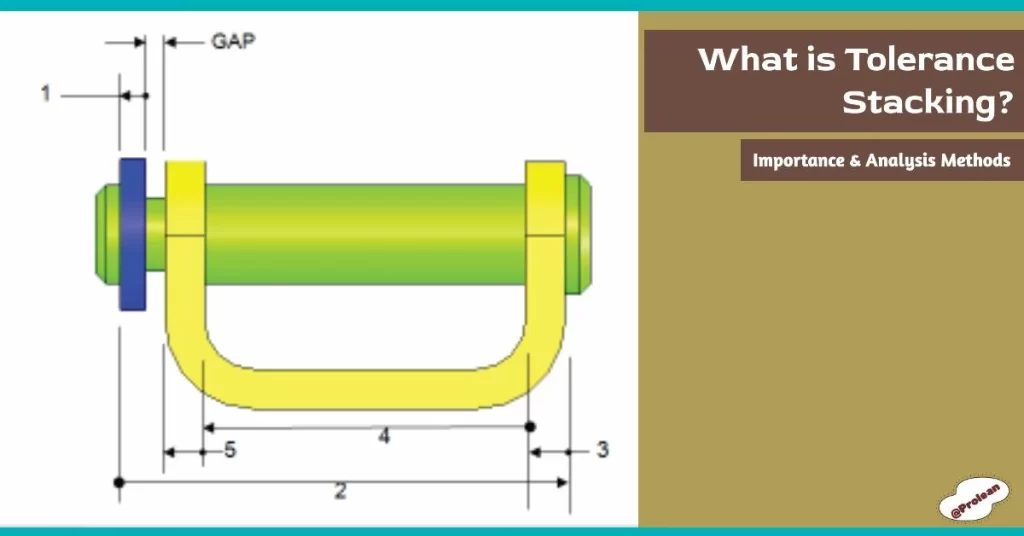
The compatibility between the tolerance of individual machined parts is essential in assembly to avoid the gap and interference between them. Designers and manufacturers analyze the cumulative tolerances of parts concerning assembly fit and clearance, called “Tolerance Stacking” analysis. CNC machining, sheet metal, molding, and other different manufacturing methods rely on this for precise and strong assembly.
This article will discuss the concept of tolerance stacking, its analysis methods, and mathematical calculation.
What is Tolerance Stacking?
Tolerance stacking or tolerance stack up refers to adding up individual tolerance of assembly parts to analyze whether they have interference and gap or not. This cumulative tolerance gives an idea about the final tolerance of the assembled part.
If the tolerance sum is greater than the allowable tolerance of assembly (or assembled item) the parts will interfere with each other. On the other hand, there will be a gap if the total tolerance sum is lower than the assembly requirement.
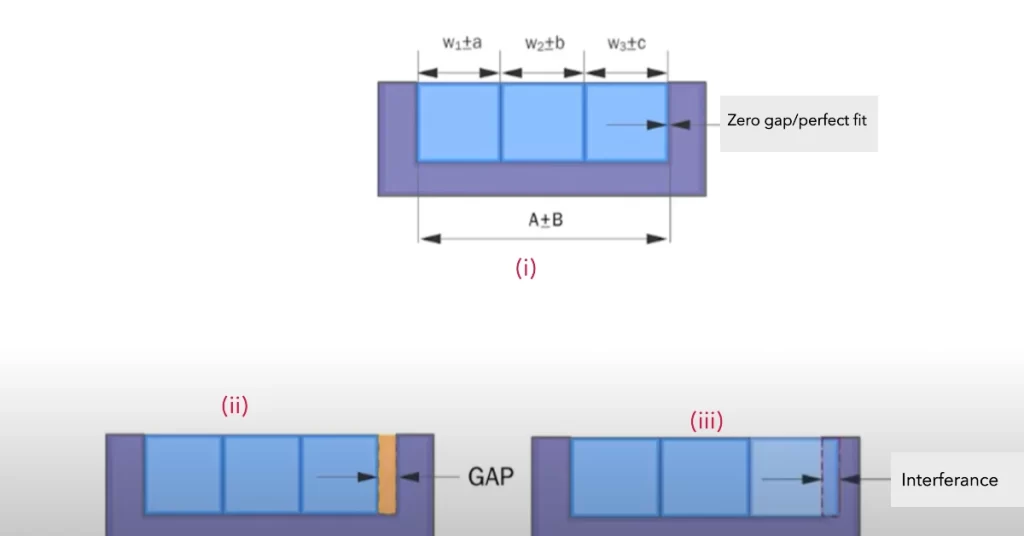
The concept of tolerance stacking
In diagram (i), the three parts are assembled with tolerances ±a, ±b, and ±c. Meanwhile, the overall tolerance for assembly is ±B. You can see the parts are in perfect fit as a+b+c=B.
In diagram(ii), there is a gap after assembly it is because a+b+c is much smaller than ±B ( a+b+c < B).
In diagram (iii), the part is interacting with the assembly dimensions. It means the a+b+c is larger than ±B ( a+b+c > B).
Try Prolean Now!
Tolerance Stack Analysis
Before assembly, engineers do a tolerance stackup analysis to see the fitting compatibility. Does the cumulative tolerance of all parts fit with assembly-tolerance criteria or not? For this, there are two major analysis methods: Worst Case Tolerance and statistical tolerance analysis.
Worst Case Tolerance Stacking Analysis
This analysis method involves adding all the individual tolerances ( either the upper limit or lower limit range), which provides the clear range or value for the maximum allowable assembly tolerance. In worst-case analysis, the individual dimensions are also added along with the tolerances.
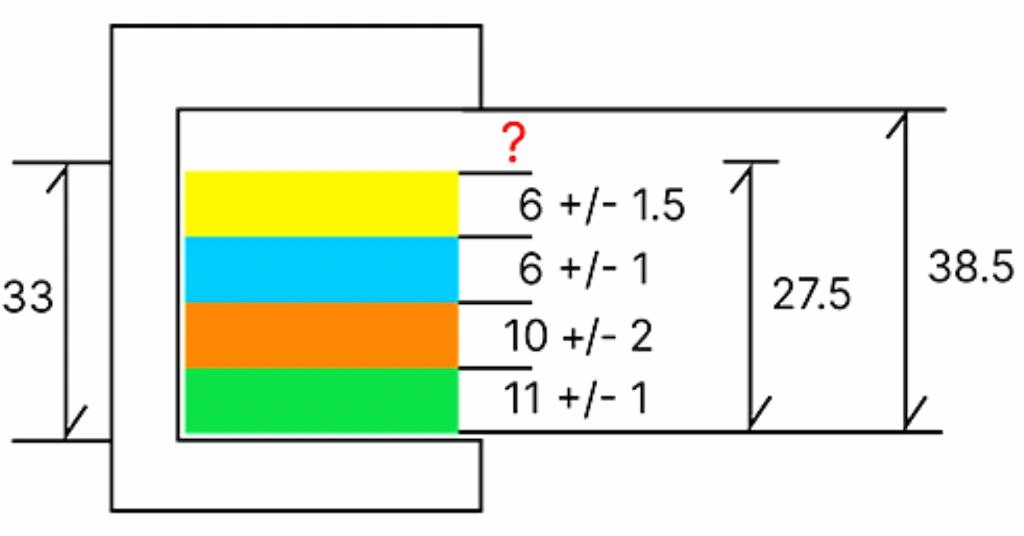
Example of worst-case analysis
Moreover, worst-case analysis assumes all tolerances reach their extremes simultaneously. Thus, even the least probable scenario will not cause fit or assembly failure.
Let’s take a real-world example of a gearbox assembly with three shafts, housing holes, and gear teeth.
| Component | Standard Dimension | Tolerance | Worst-Case Deviation |
| Shaft Length | 100 mm (per shaft) | ±0.5 mm | 1.5 mm (for 3 shafts) |
| Housing Hole Alignment | Ideal alignment | ±0.3 mm | 0.9 (three holes) |
| Gear Teeth Positioning | Ideal fit | ±0.1 mm | 0.3 (three gears) |
| Total Misalignment | ± 2.7 mm |
In the worst case, the alignment could be off by 1.5 mm + 0.9 mm + 0.3 mm = 2.7 mm from the ideal scenario. It is okay to proceed with assembly if the overall gearbox tolerance equals ±2.7mm.
Statistical Tolerance Stack Analysis
This is a more accurate analysis method that uses standard deviation, root mean square, and other statistical measurements to check whether each part falls under the distributed tolerance range or not.
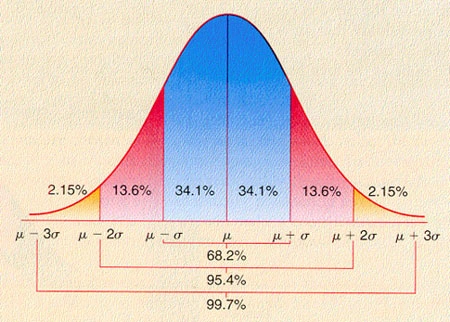
Statistical tolerance distribution across parts
Instead of assuming all tolerances will reach their extremes, statistical analysis treats the tolerance of each part separately as a random variable. The root mean square (RMS) gives the cumulative tolerance through distribution for part-to-part variation.
Typically, different computer software is used for this type of stack analysis, including individual CNC machining tolerance of machined parts. Some examples of tolerance analysis software are CATIA V5-V6 and SOLIDWORKS. 3DCS, etc, We will discuss these in the next section.
The Process of Tolerance Stack Up Analysis
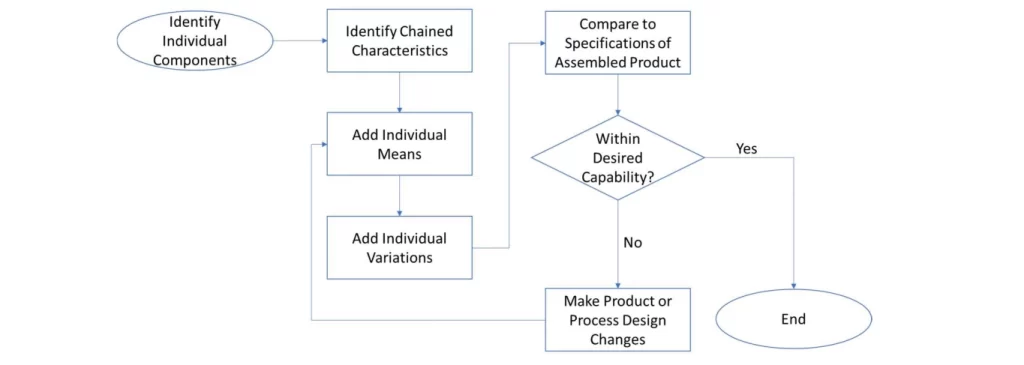
Flowchart for stack up analysis process
It involves the identification of the variation in individual components and adding them to analyze if the assembled products will be within the desired limits.
Let’s look at the stack-up analysis steps;
| SN | Steps | Description |
| 1 | Identify Each Component | List each component in the assembly. |
| 2 | Chained Characteristics | Determine the critical features affecting fit and function. |
| 3 | Add Individual Means | Calculate the mean tolerance of each component. |
| 4 | Add Individual Variations | Sum up the tolerance variations across components. |
| 5 | Compare to Specifications | Check if the total tolerance falls within acceptable limits. |
| 6 | Make Design Changes | Adjust design or process if tolerance exceeds limits. |
Try Prolean Now!
Three Major Tolerance Analysis Software
All the tolerance analysis software uses statistical analysis models for stack prediction and calculations. These tips are also helpful for CNC precision machining of performance-sensitive applications.
SOLIDWORKS Tolerance Stack-Up Analysis
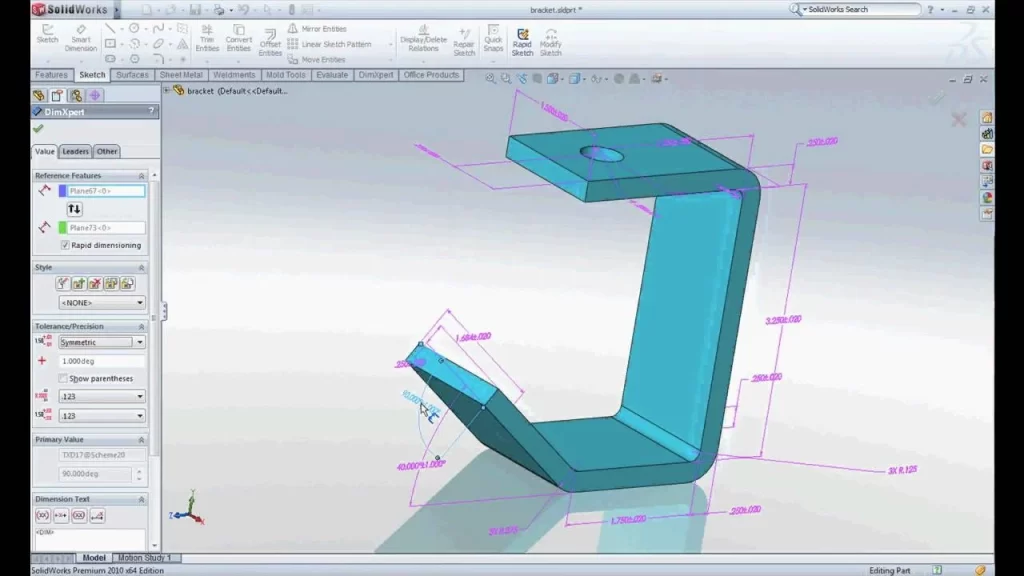
Tolerance stack up analysis in SolidWorks
You can find this analysis tool on SolidWorks design software integration. This can assess the cumulative effects of part tolerances on assemblies, mainly for 1D and 2D tolerance stacks. SolidWorks is popular among designers as it can be used without switching the software. It provides an intuitive interface to detect tolerance issues early in the design phase.
3DCS Variation Analyst
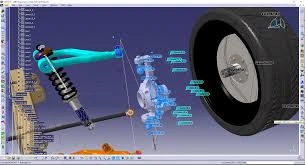
3DCS variation analysis example
3DCS Variation Analyst provides comprehensive tolerance analysis for complex assembly and it can be integrated with CAD tools like CATIA, NX, and Creo. You can visualize parts’ variations directly within 3D models. The software supports Monte Carlo simulations, sensitivity analysis, and what-if scenarios.
CETOL 6σ
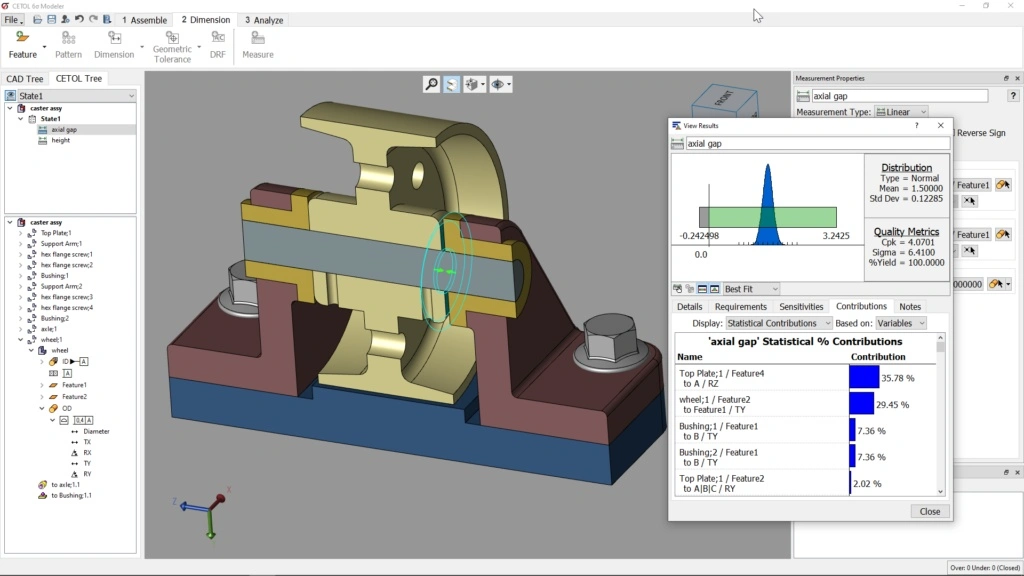
CETOL 6σ analyis
CETOL 6σ tool is also integrated with CAD designing tools like SolidWorks, CATIA, and AutoCAD. This analysis tool leverages Six Sigma methodologies to examine the impact of individual tolerance variations in the assembly. Additionally, you can simulate different scenarios with the CETOL 6σ to see the visuals.
Importance of Tolerance Stack Analysis in Manufacturing
The main purpose of tolerance stack analysis is to find out the uncertainty of assembly fittings and failure. Analyzing the effect of each single part on the overall assembly tolerance helps to understand the scope and limitations of designs.
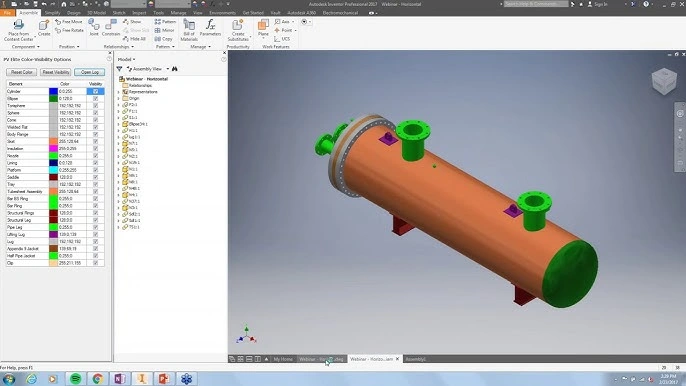
Best fit finding with stack up analysis
Let’s elaborate 5 key importance in brief;
- Validating the Design Outcomes
The analysis results scientifically tell whether the designed parts’ tolerances fit perfectly during assembly or not. If they interfere or produce the gap, designers might need to adjust the GD&T. If okay, the design is okay to proceed with the manufacturing operations.
- Accuracy of Final Prod
Stack-up analysis allows for early identification of design or tolerancing errors. So, the tolerances can be adjusted to achieve the optimal accuracy in the assembly process. Additionally, it also saves the additional costs of materials wastage & design modifications.
- Production Quality Control
Calculation for the cumulative effect of individual tolerances is key for quality control. It ensures that all assembled components fit and function correctly. So, examining how each variations accumulate, engineers & designers predict and control the overall dimensions and fit of an assembly.
Effective Tips for the Tolerance Stacking Analysis
The following are some tips based on the industry practices of tolerance stacking examination & calculation;
Label Your Drawing with Correct GD&T
Geometrical guidelines and tolerancing(GD&T) are essential whether you are using worst-case scenarios or statical stack-up tolerance. If possible, use consistent tolerances for identical features in assembly parts. Additionally, over-dimensioning also influences the accuracy of analysis.
Consider Manufacturability
While preparing the drawings & labeling the GD&T, consider the capability of the machines or equipment you are using. Check whether you can achieve the desired tolerances of parts or not.
Choose the Right Tool for Stack Up Analysis
Based on the number of parts and assembly complexity, choose the appropriate tool for the analysis. Check whether your design software( AutoCAD, SolidWorks, CATIA, etc) has extensions or integrated tools for it or not. If not, you might need to switch the platforms. Additionally, check which method is best for your design. For example, Six Sigma methodologies are ideal for complex assembly designs.
Prefer Statistical Tolerance Analysis
Especially for the complex and multiple tolerance, use a statistical analysis model that accurately calculates the stackup distribution and simulates the real-case scenarios. The standard deviation and root sum squared are more realistic than the worst-case analysis.
Read More: Micro Machining
Try Prolean Now!
Summing Up
Overall, tolerance stacking is an essential analysis for the perfect fitting of each part in a mechanical assembly. You can use worst-case analysis and root mean square method for the calculation of tolerance stacks in manufacturing.
At ProleanTech, we use different tolerance analysis software for CNC machined and other manufactured parts before assembly. This way, we ensure product quality, lower cost, tight tolerances, and streamlined assembly. Get the machining service from us that is not only effective but also guarantees the utmost precision and reliable assembly fittings.
FAQs
What is tolerance stacking analysis in CAD?
It is the assessment of combined dimensional tolerances across multiple components in an assembly to find out their effects, such as t excessive gaps or interference.
How to do tolerance stack up calculation?
First, identify all dimensions & tolerances contributing to the stack-up in an assembly. Then, statistical or worst-case methods can be applied to the stack calculations. You can also directly use computer software for the calculation.
Why is Tolerance stack up important?
Tolerance stack-up prevents assembly issues and reduces the cost while ensuring high product reliability.
Which tolerance analysis method is suitable for my project?
The choice depends on your project’s complexity, precision requirements, and budget. Statistical analysis is ideal for dor high-precision assemblies, whereas a worst-case analysis is enough for simple designs.


0 Comments